Setup the APEX Office Print (AOP) Server with the Oracle Cloud APEX Service
.91a06b5.svg)
Wednesday, April 28, 2021
![]()
This post is part of the series My spin on the new Oracle APEX Application Development Service.
To print and export data from the APEX Service in the Oracle Cloud, you can use APEX Office Print (AOP).
AOP allows you to generate documents based on templates created in Word, Excel, PowerPoint, HTML, and Text.
For example, people use AOP to create an invoice, send a packaging slip, export an Excel spreadsheet with multiple sheets, or have a monthly PowerPoint presentation with the latest sales numbers.
AOP the go-to print engine for Oracle APEX and the Oracle database and it offers both a cloud service and an on-premises solution. Having your APEX Service talk to the AOP Cloud is straightforward as there's really no installation to do. You can find more info about that in this blog post. But, what if you want your own dedicated AOP server for your APEX Service? Many people actually like to have their own instance so they can print as much as they want, have full control, and maximum speed - as it's closest to your database. In this post, I will show one way to set up your own APEX Office Print (AOP) Server which works with the Oracle APEX Application Development Service.
The special bit with the Oracle APEX Service is that it's a fully managed service, which means the database, ORDS, and APEX are pre-configured, auto-patched, auto-scalable, and optimized. I think it's awesome, but the downside is that you don't have direct access to the machine and the network.
The installation is a 3 step process:
1. Import the AOP Server image in your own Oracle Cloud
2. Create a Compute instance based on this image
3. Create a Gateway to this instance
The following is a step-by-step guide:
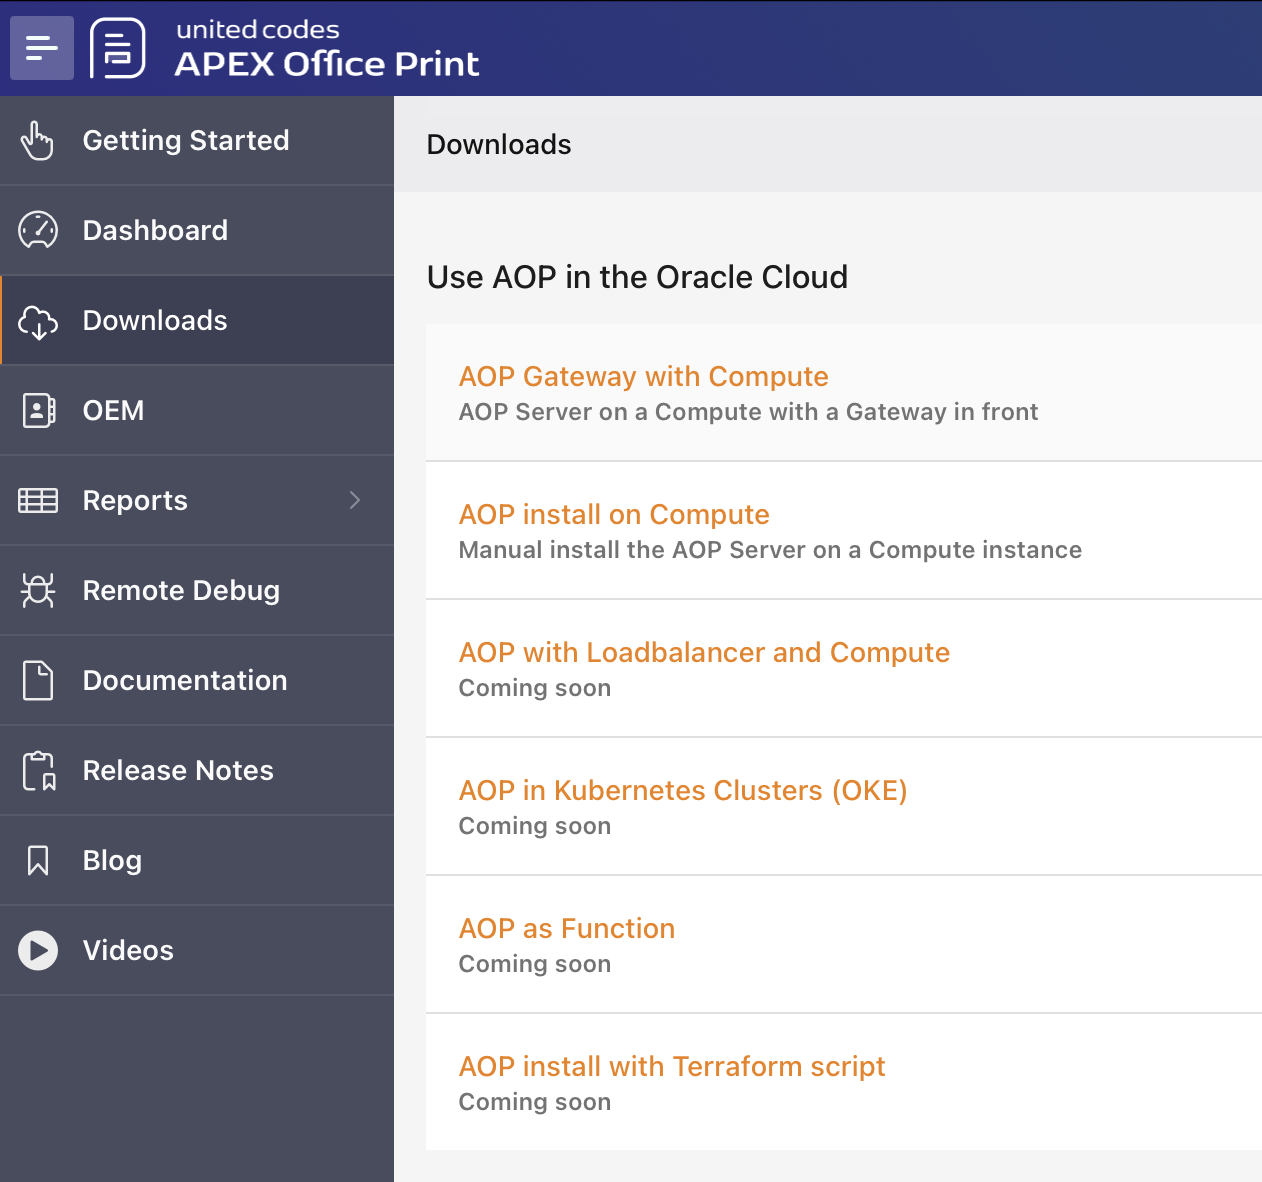
(1) Login into apexofficeprint.com, go to the Downloads section, and click AOP Gateway with Compute
This will copy the URL of the AOP image, which we will import in your own Oracle Cloud. (FYI we are focussing heavily on the ability to let you run your own AOP instance in the Oracle Cloud, so in the Oracle Cloud section on our website, you will find more ways to run AOP).
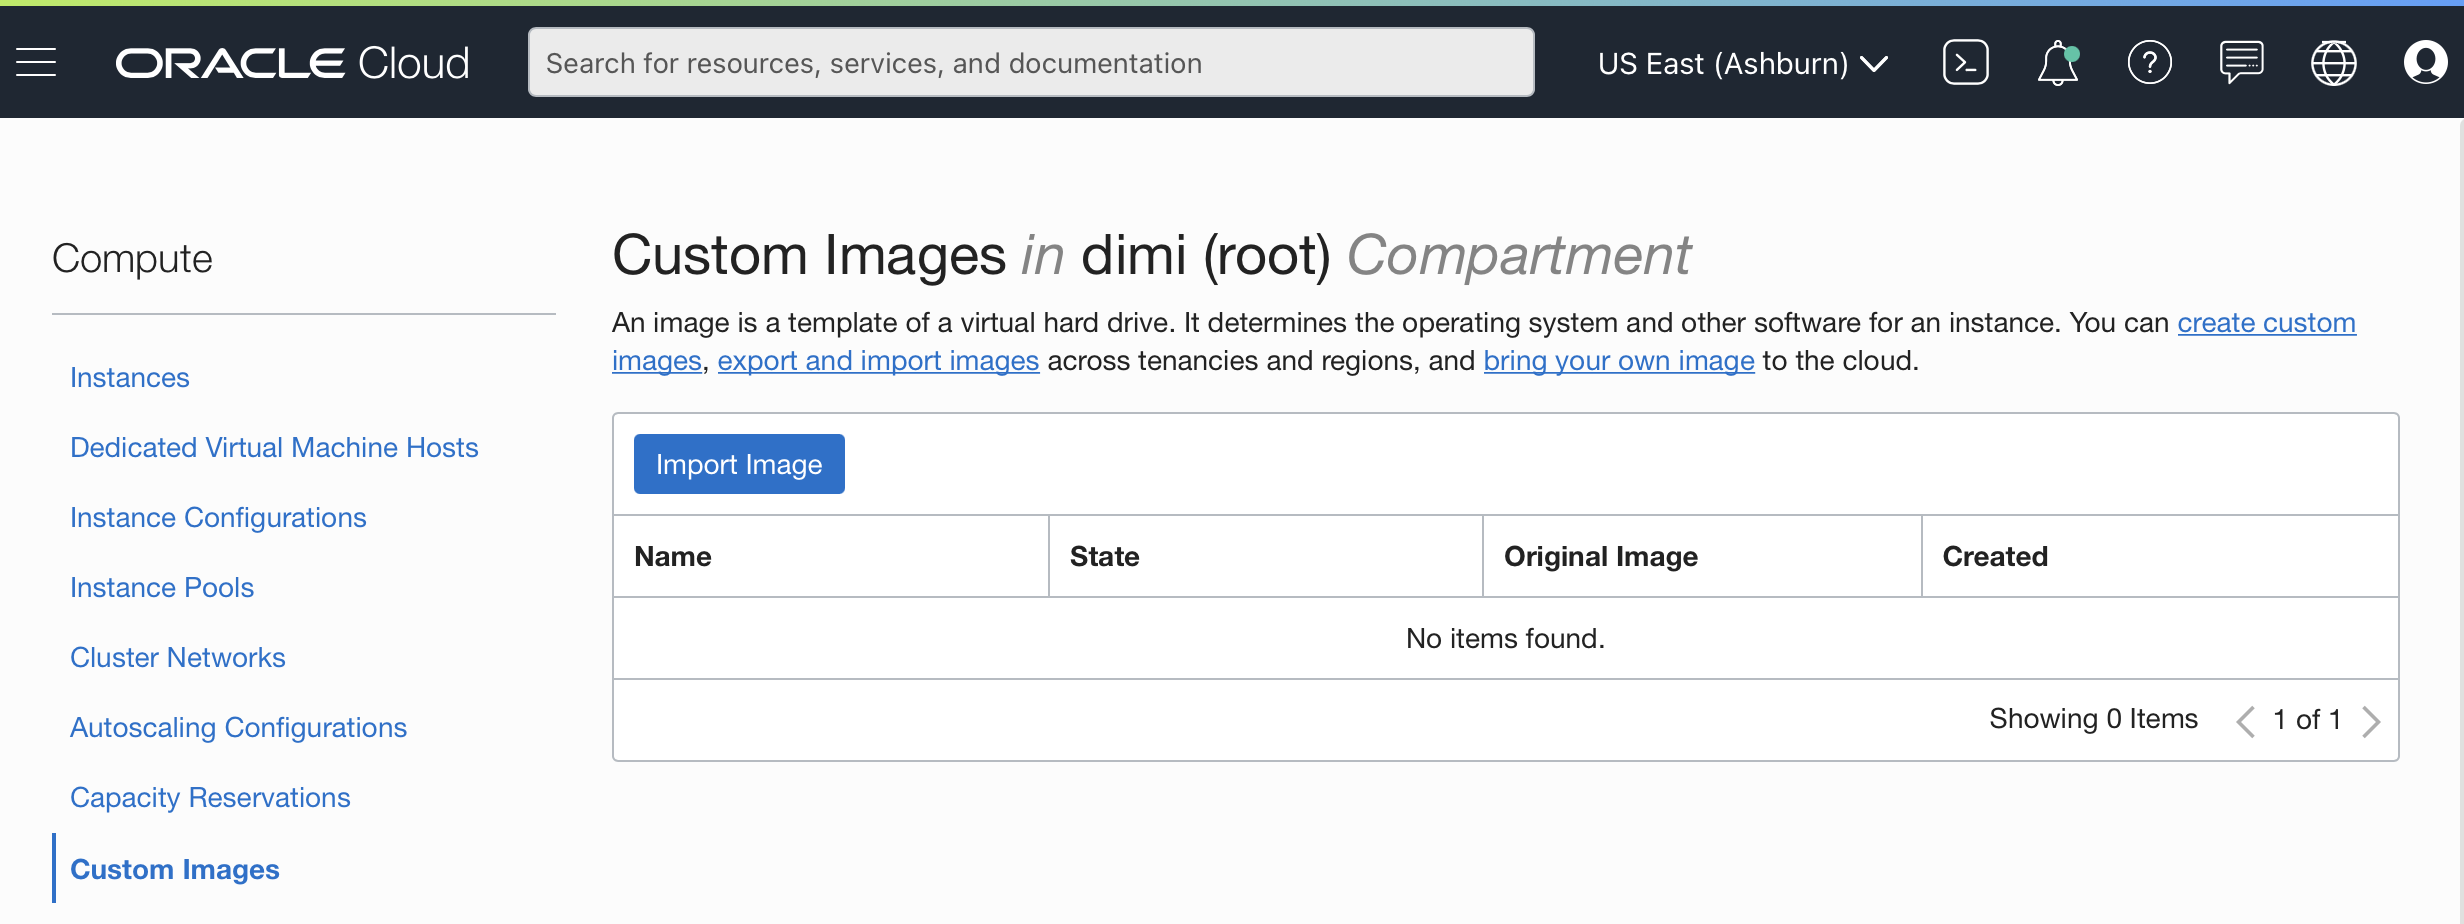
Go to your own Oracle Cloud dashboard and click Compute - Custom Images:

Click the Import Image button:
Give it a name and copy the link that is in the clipboard to the Object Storage URL:

Hit the Import Image button:
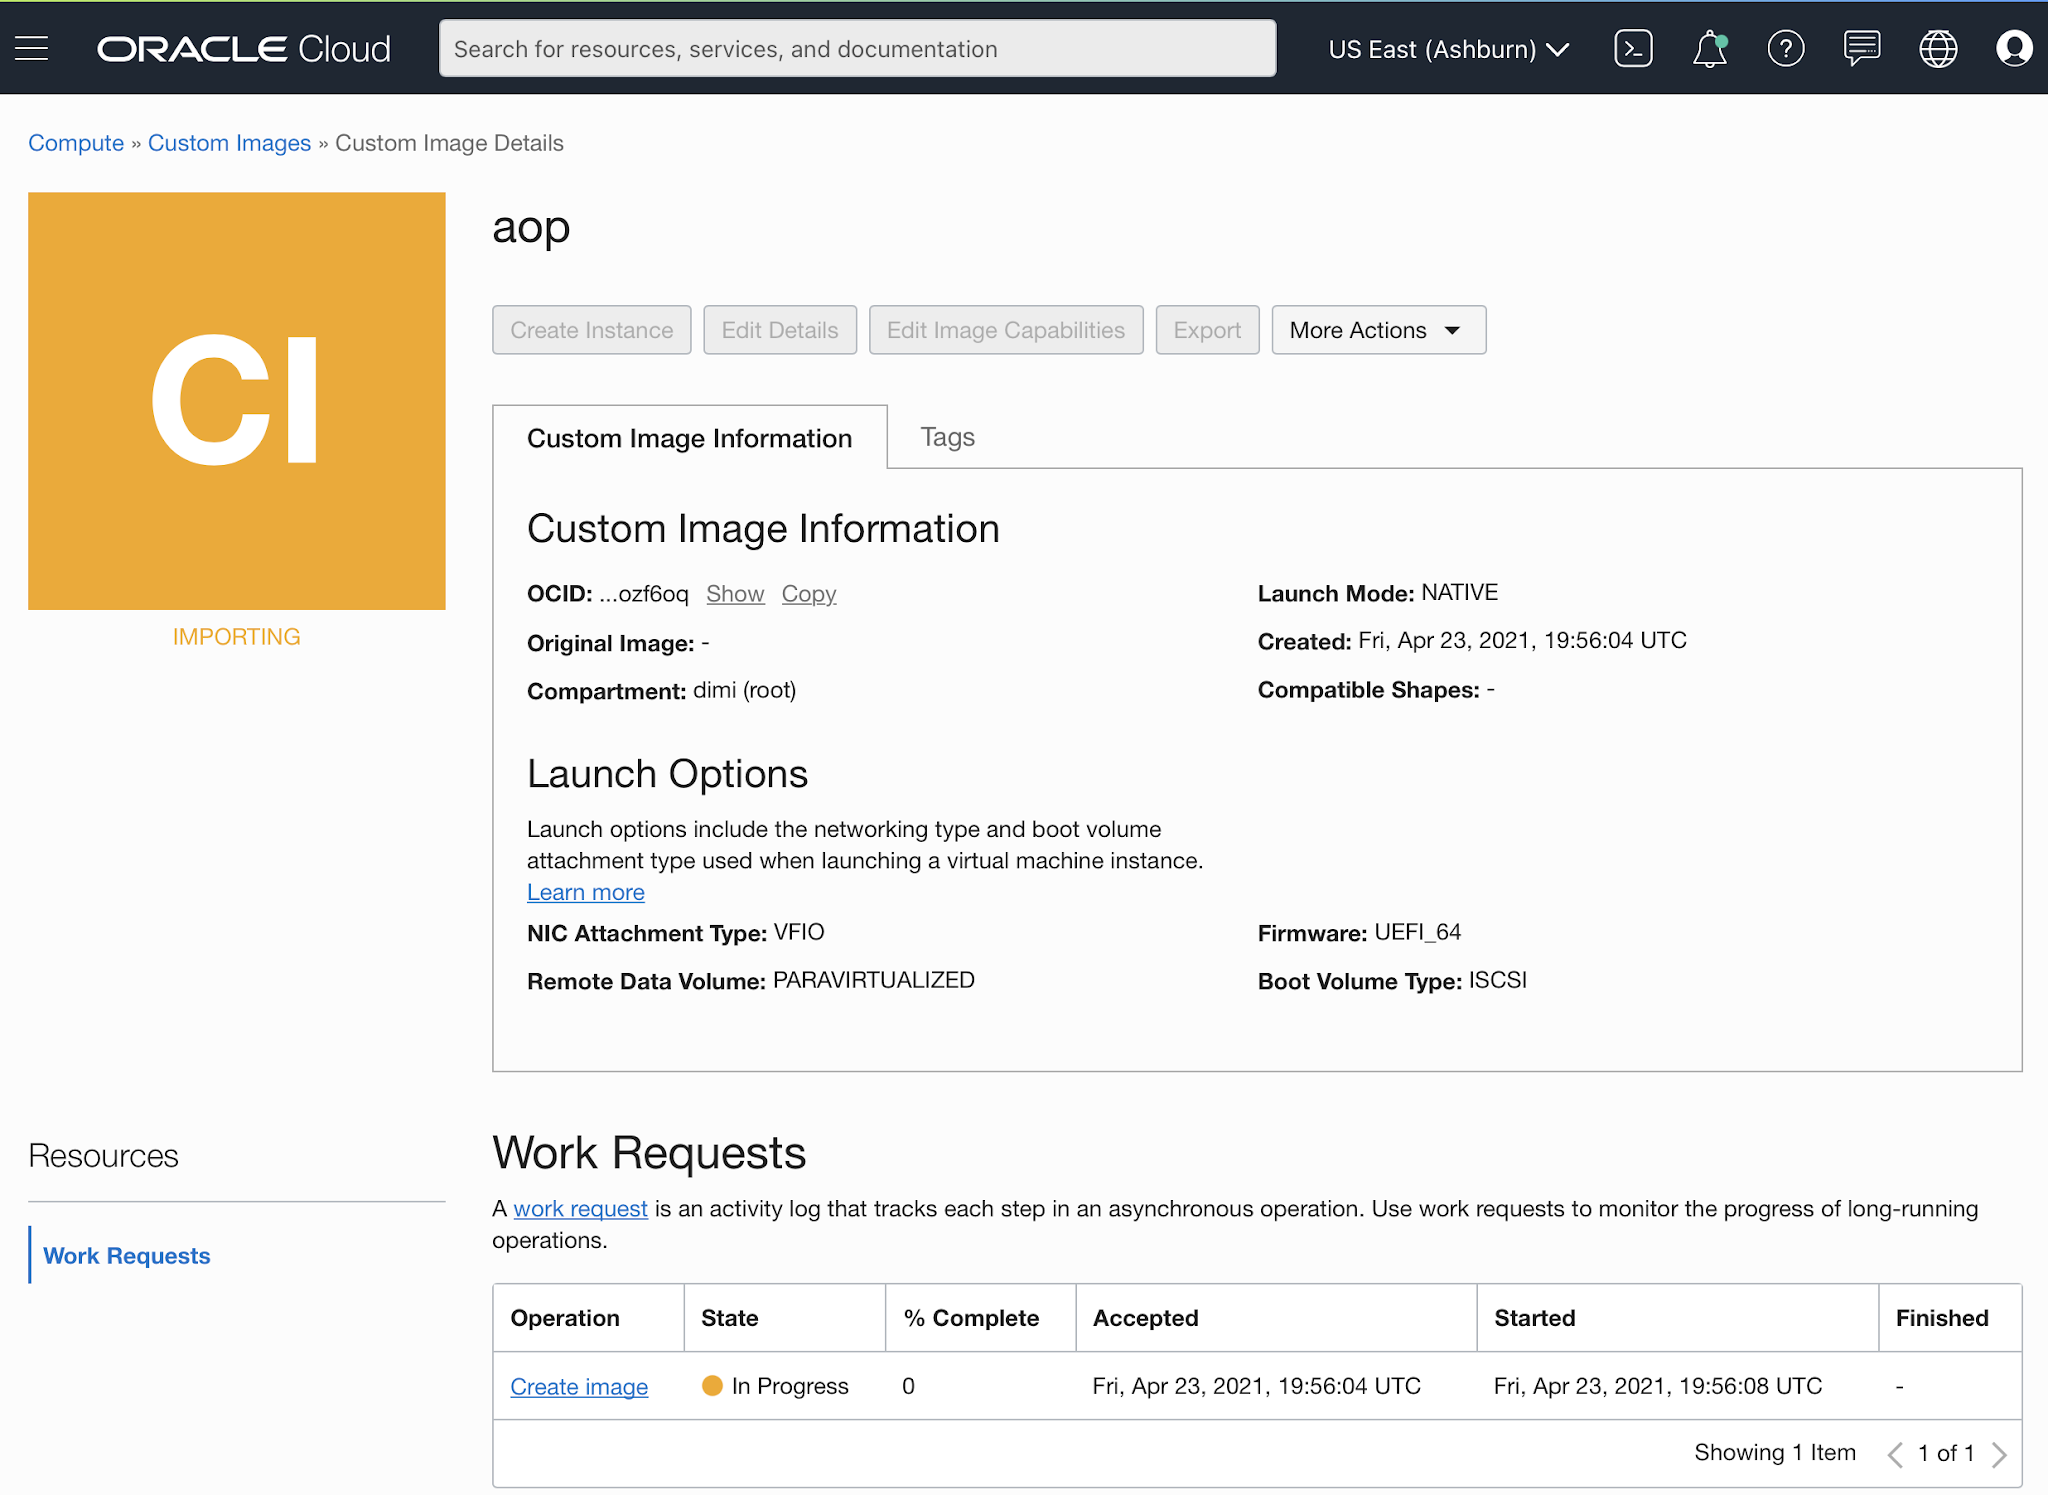
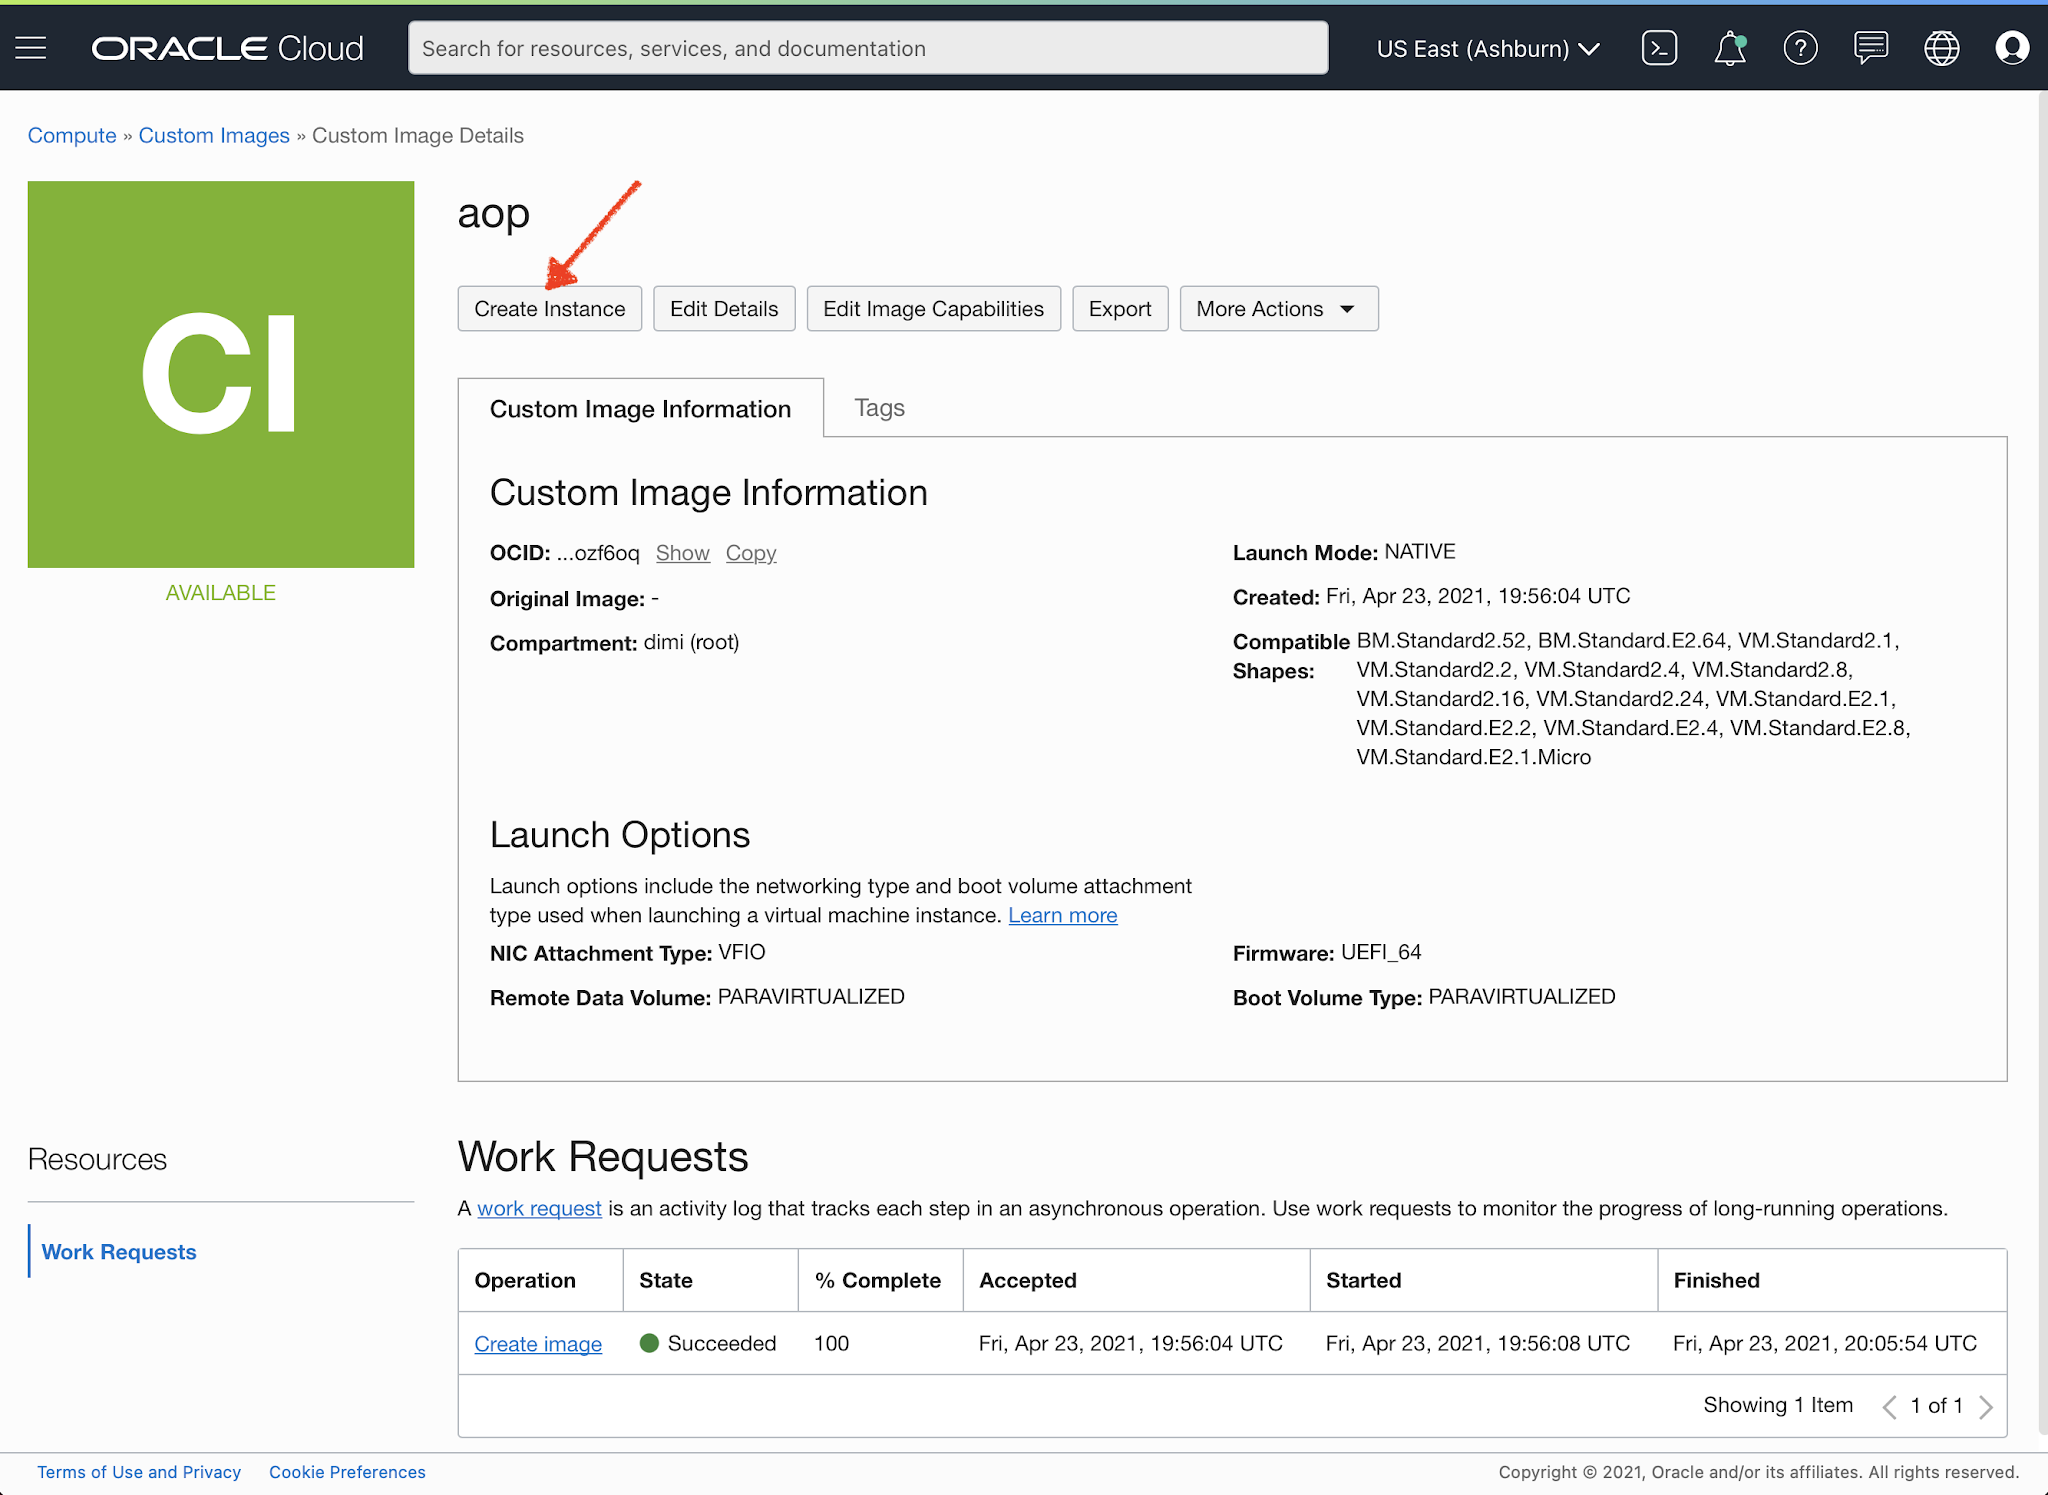
(2) It might take a few minutes in order for it to create the image, but once it's green, we can Create Instance from this image:
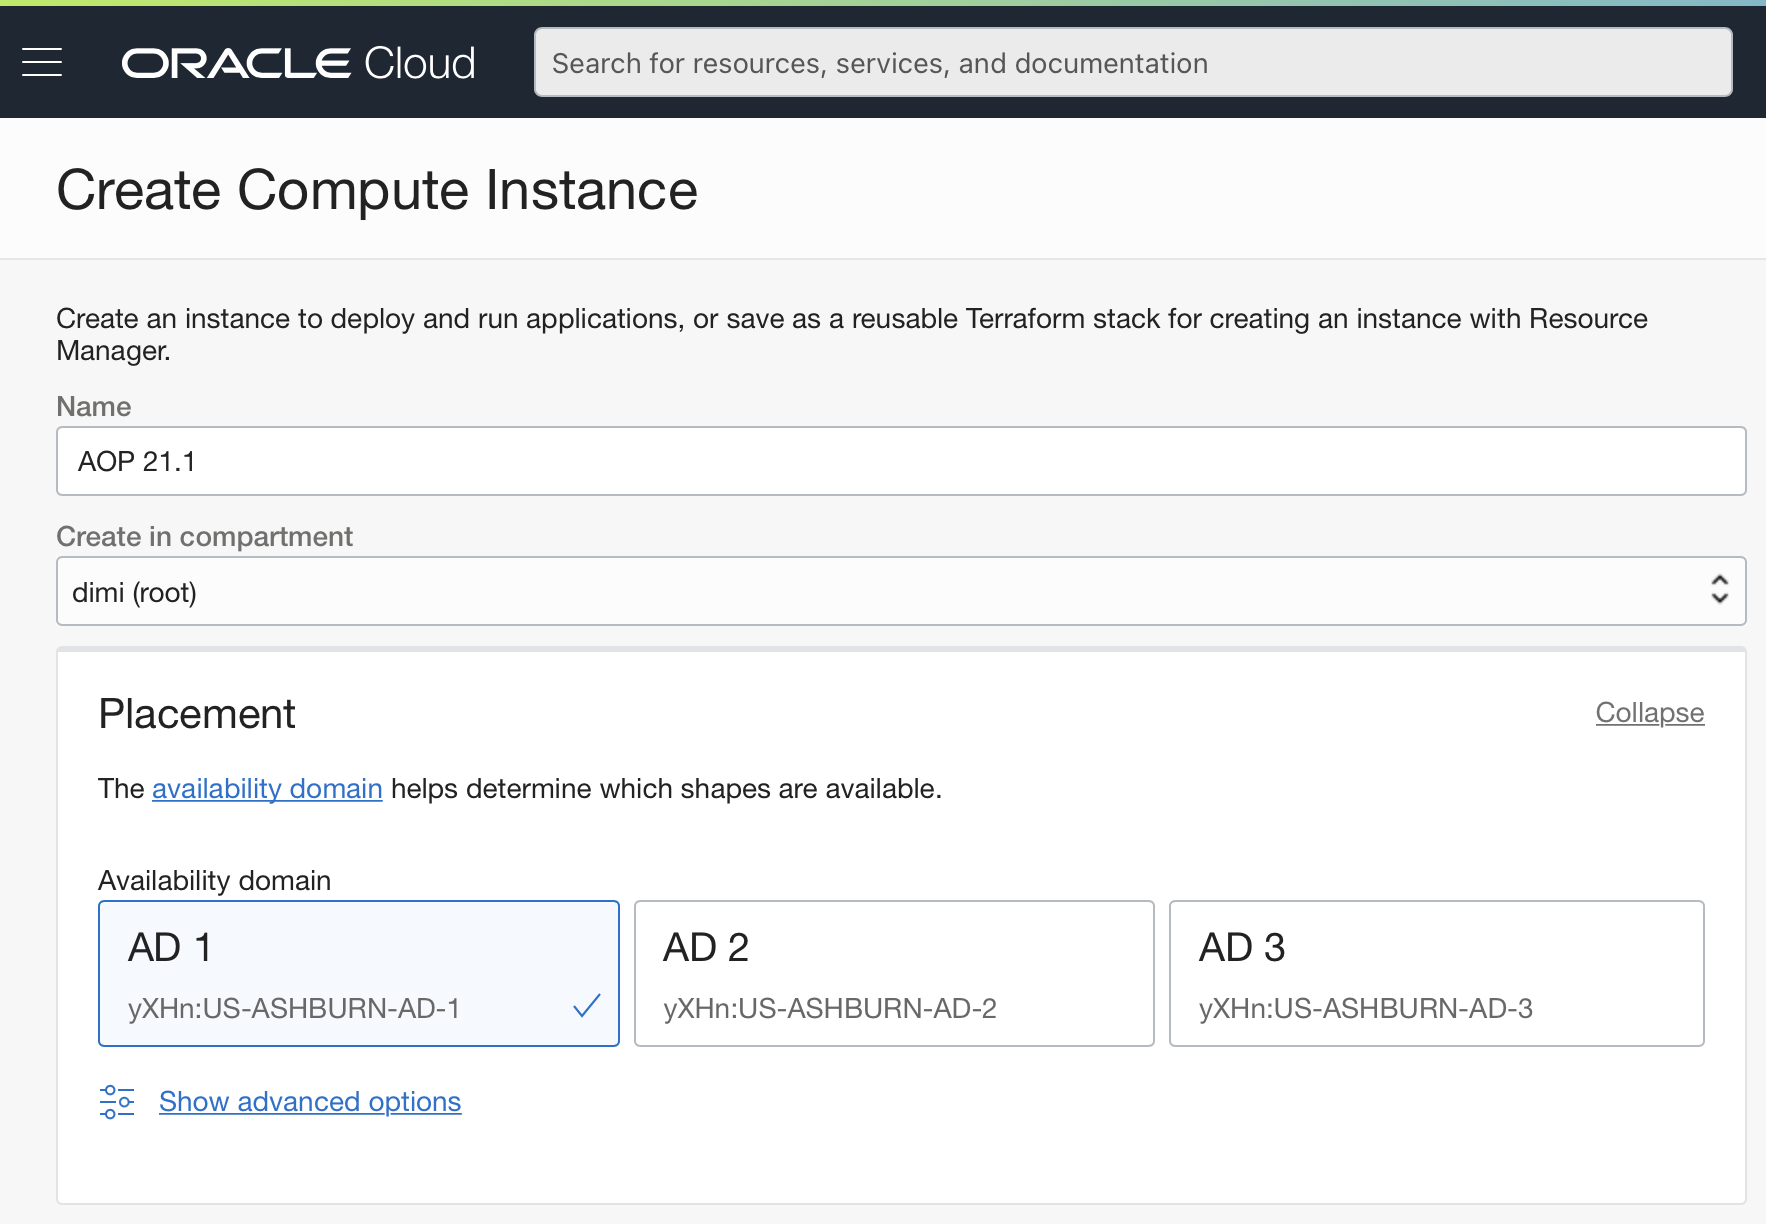
Give the instance a name, select where you want the Compute instance to be, and select an Image and shape:
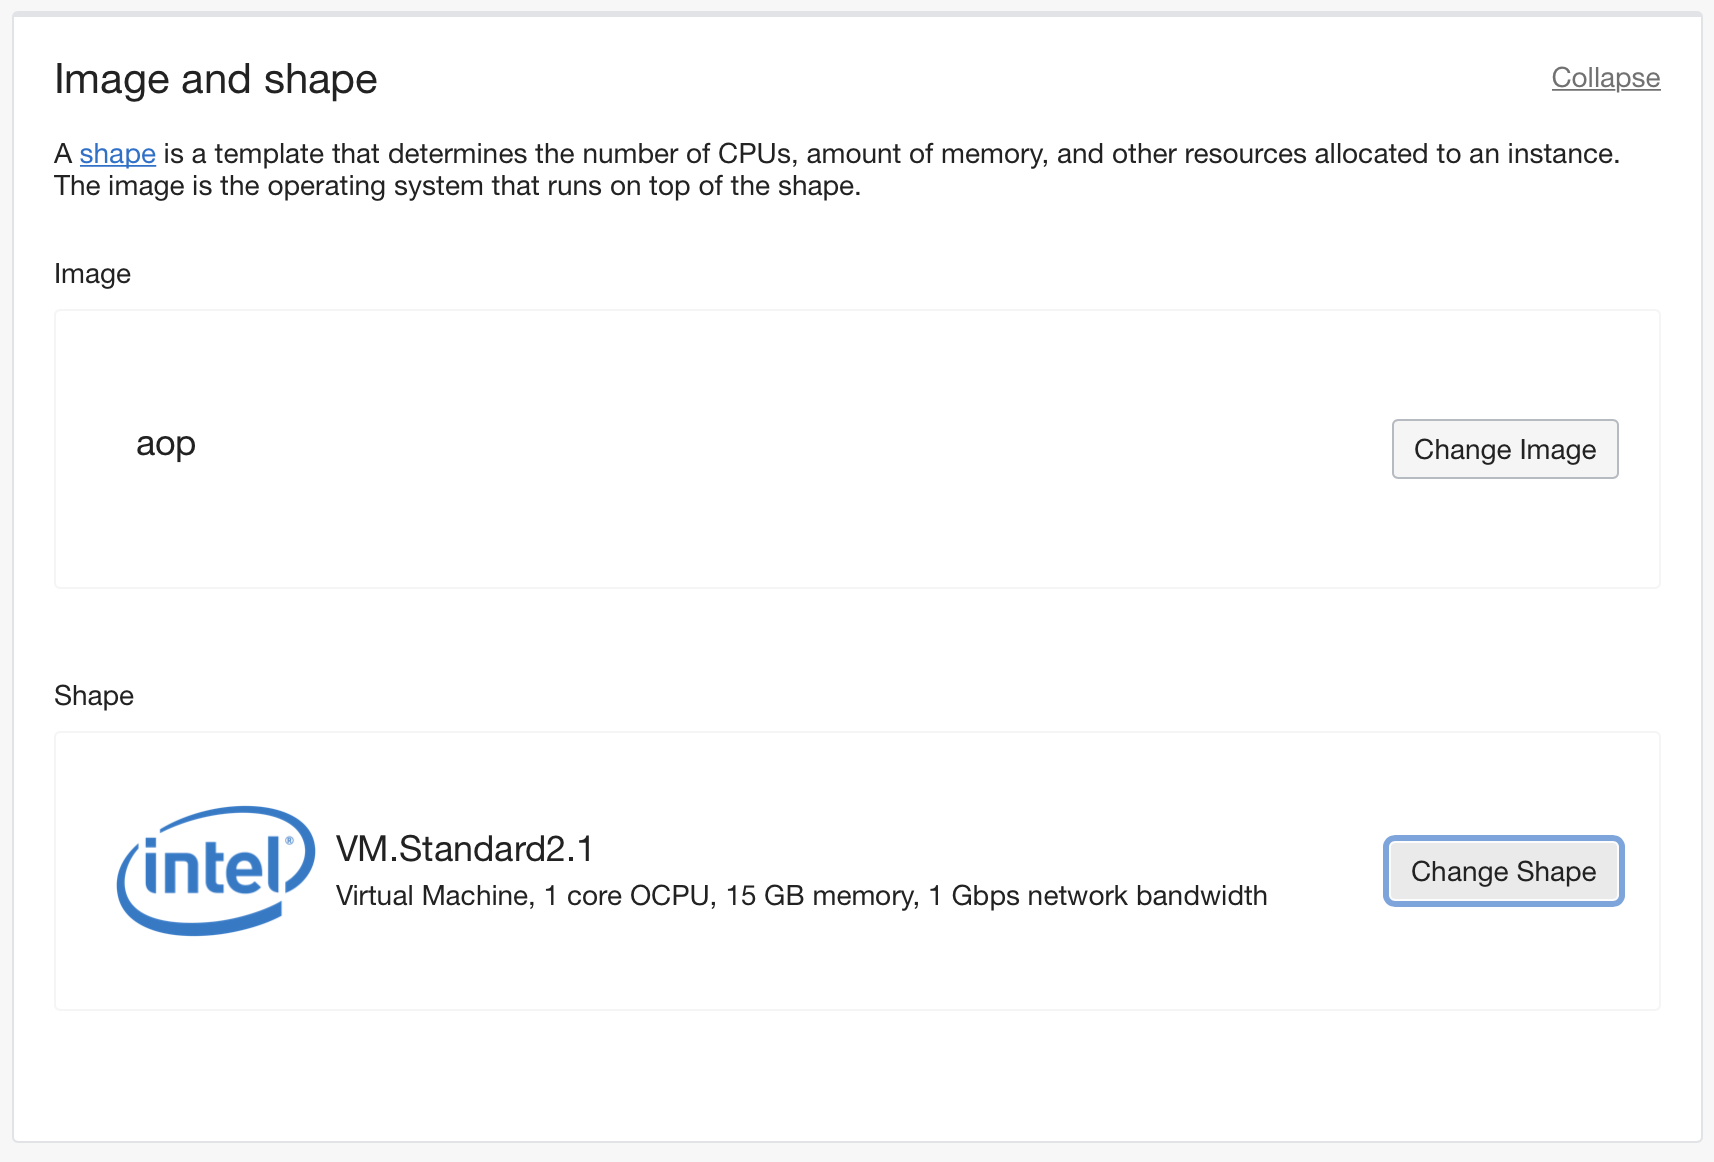
The selection of the shape really depends on how much you print. I like, for example, the flexible shape
AMD Rome: VM.Standard.E3.Flex (2 OCPU, 20GB Mem) which will cost around $60 a month.
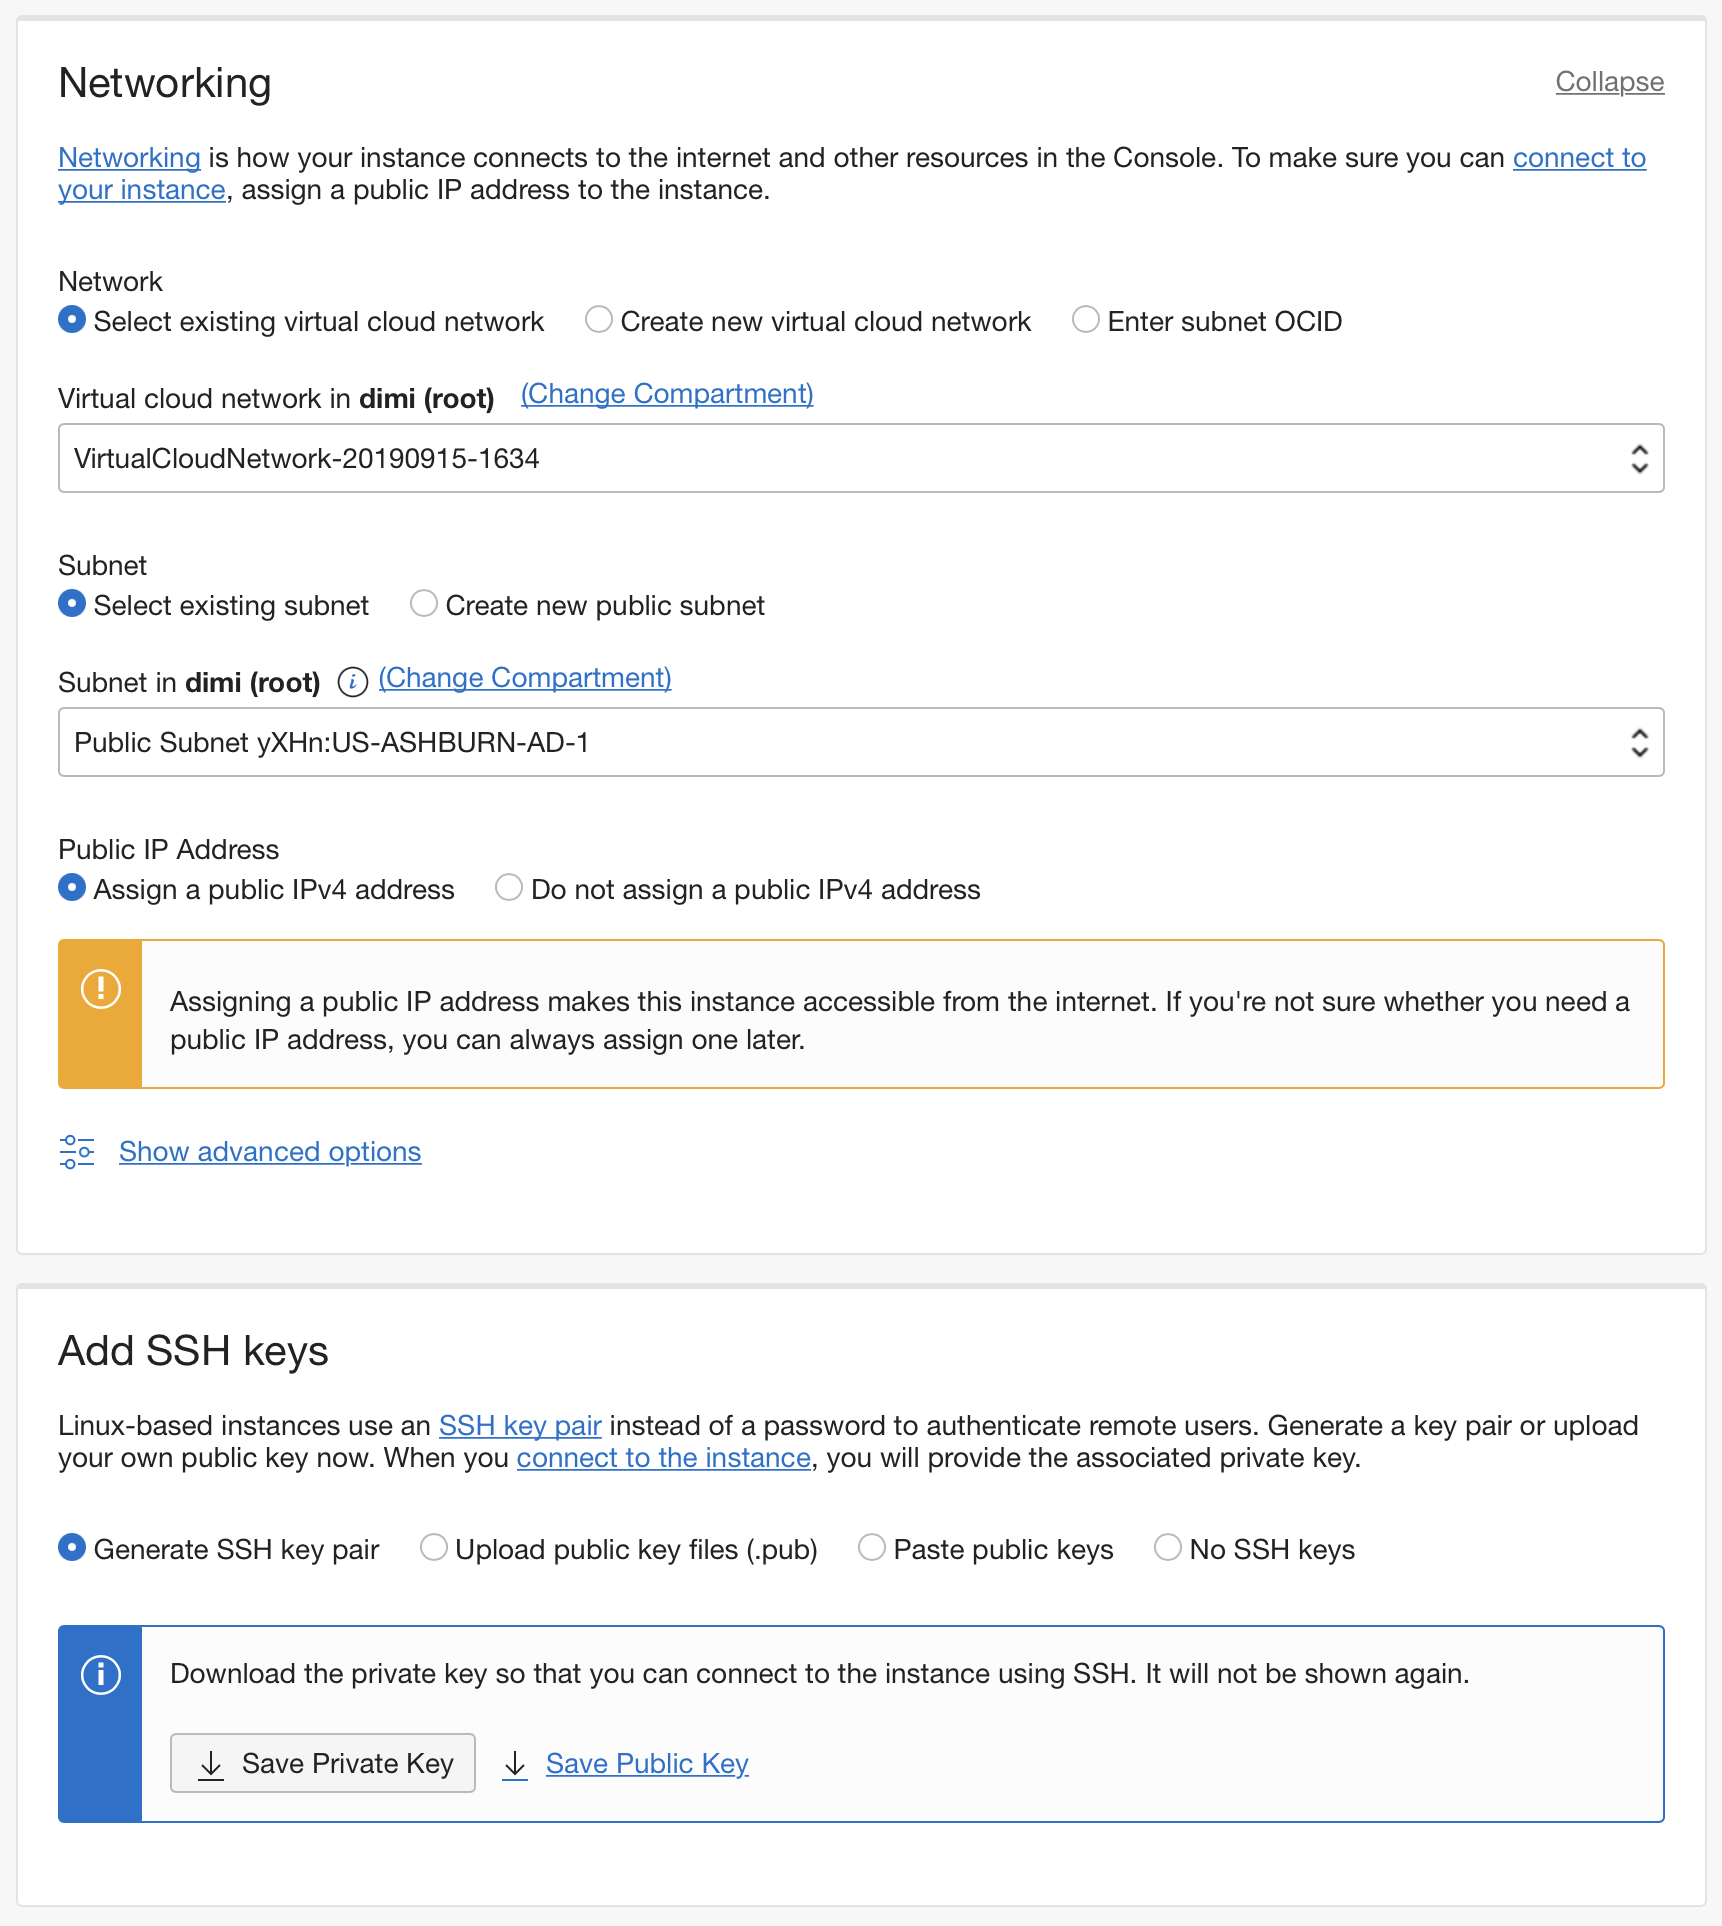
Select the network and assign a public IP address. Note that the public IP is not really necessary, but it just makes the activation of AOP easier as you can connect directly to the Compute instance:
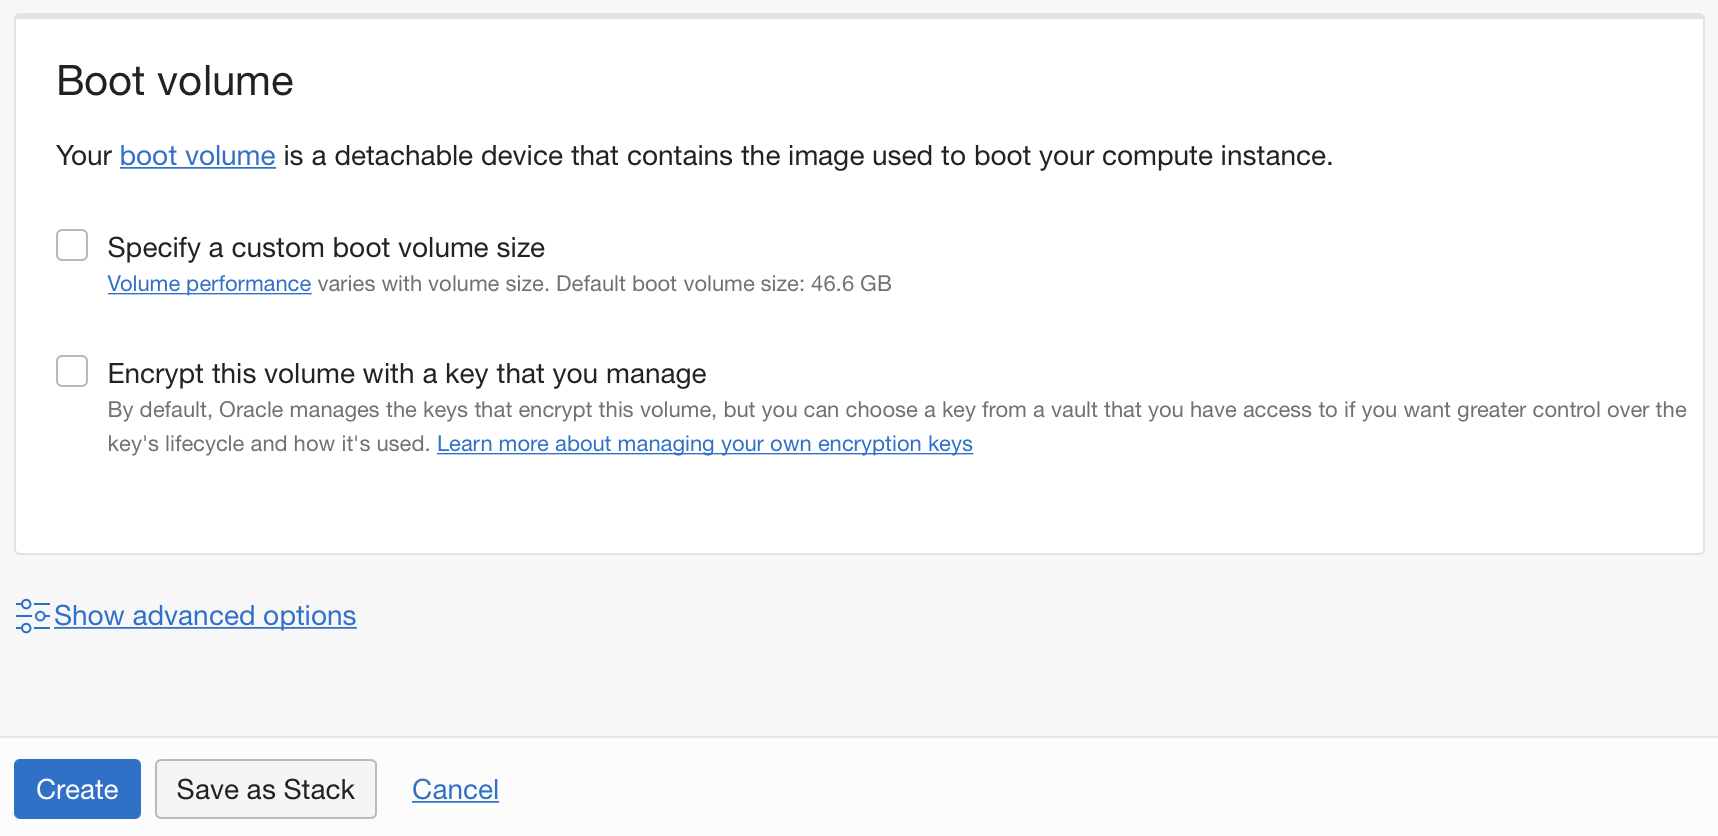
Finally hit the Create button:
Now the Compute Instance will be created:
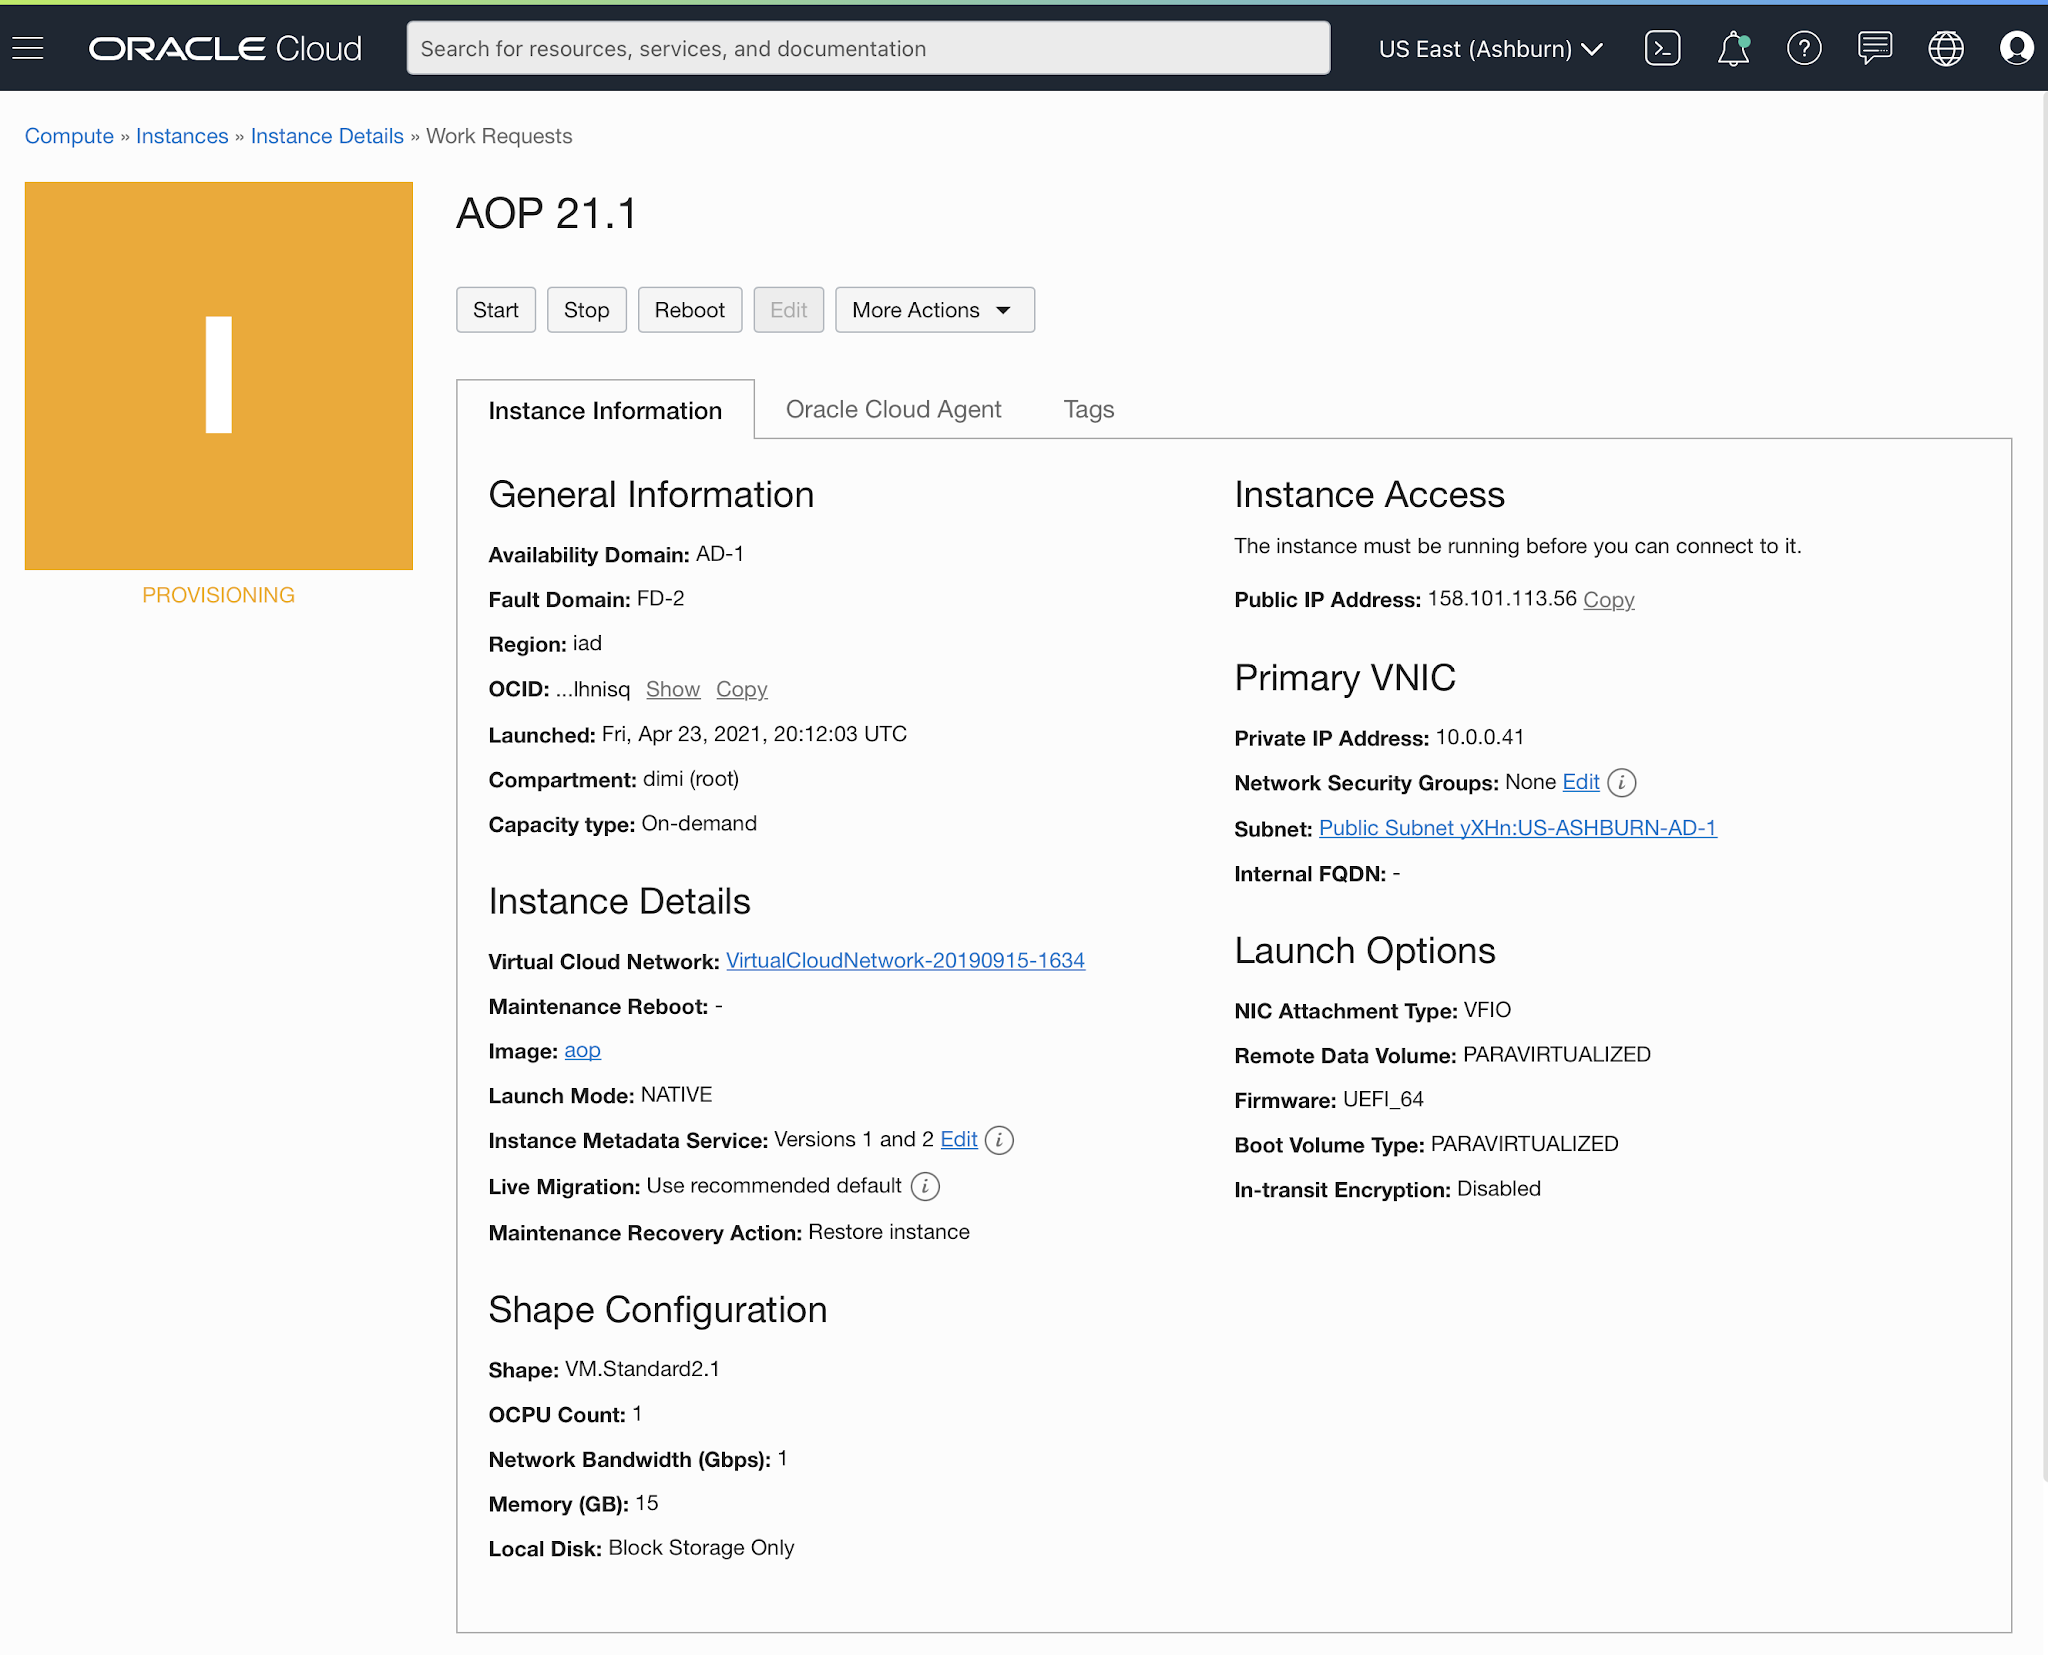
A few minutes later, the pre-configured AOP instance is up and running.
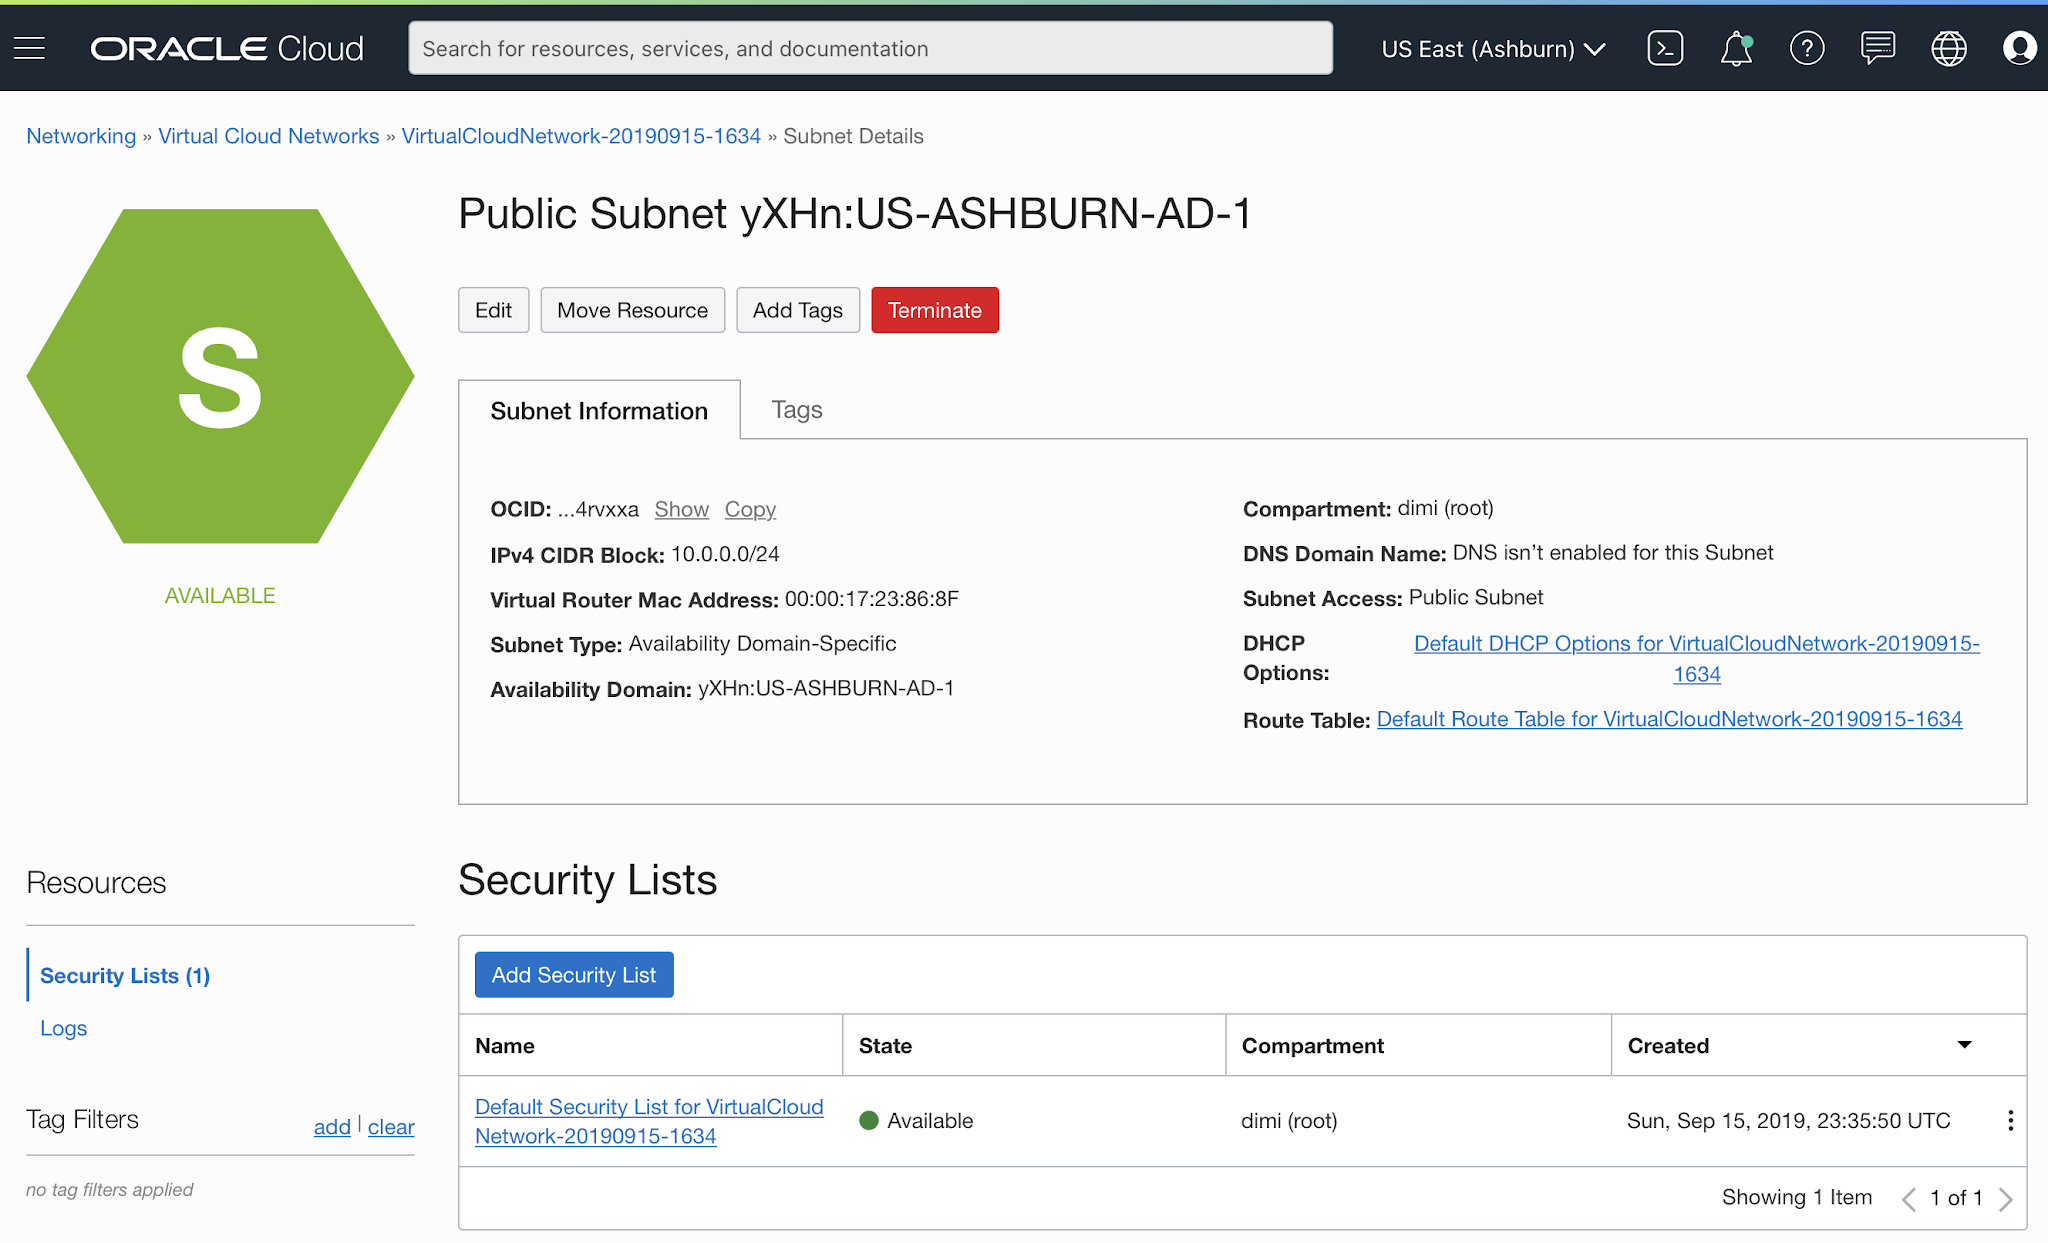
Write down the Private IP Address and Click on Subnet:

Next click on the name of the Security Lists:
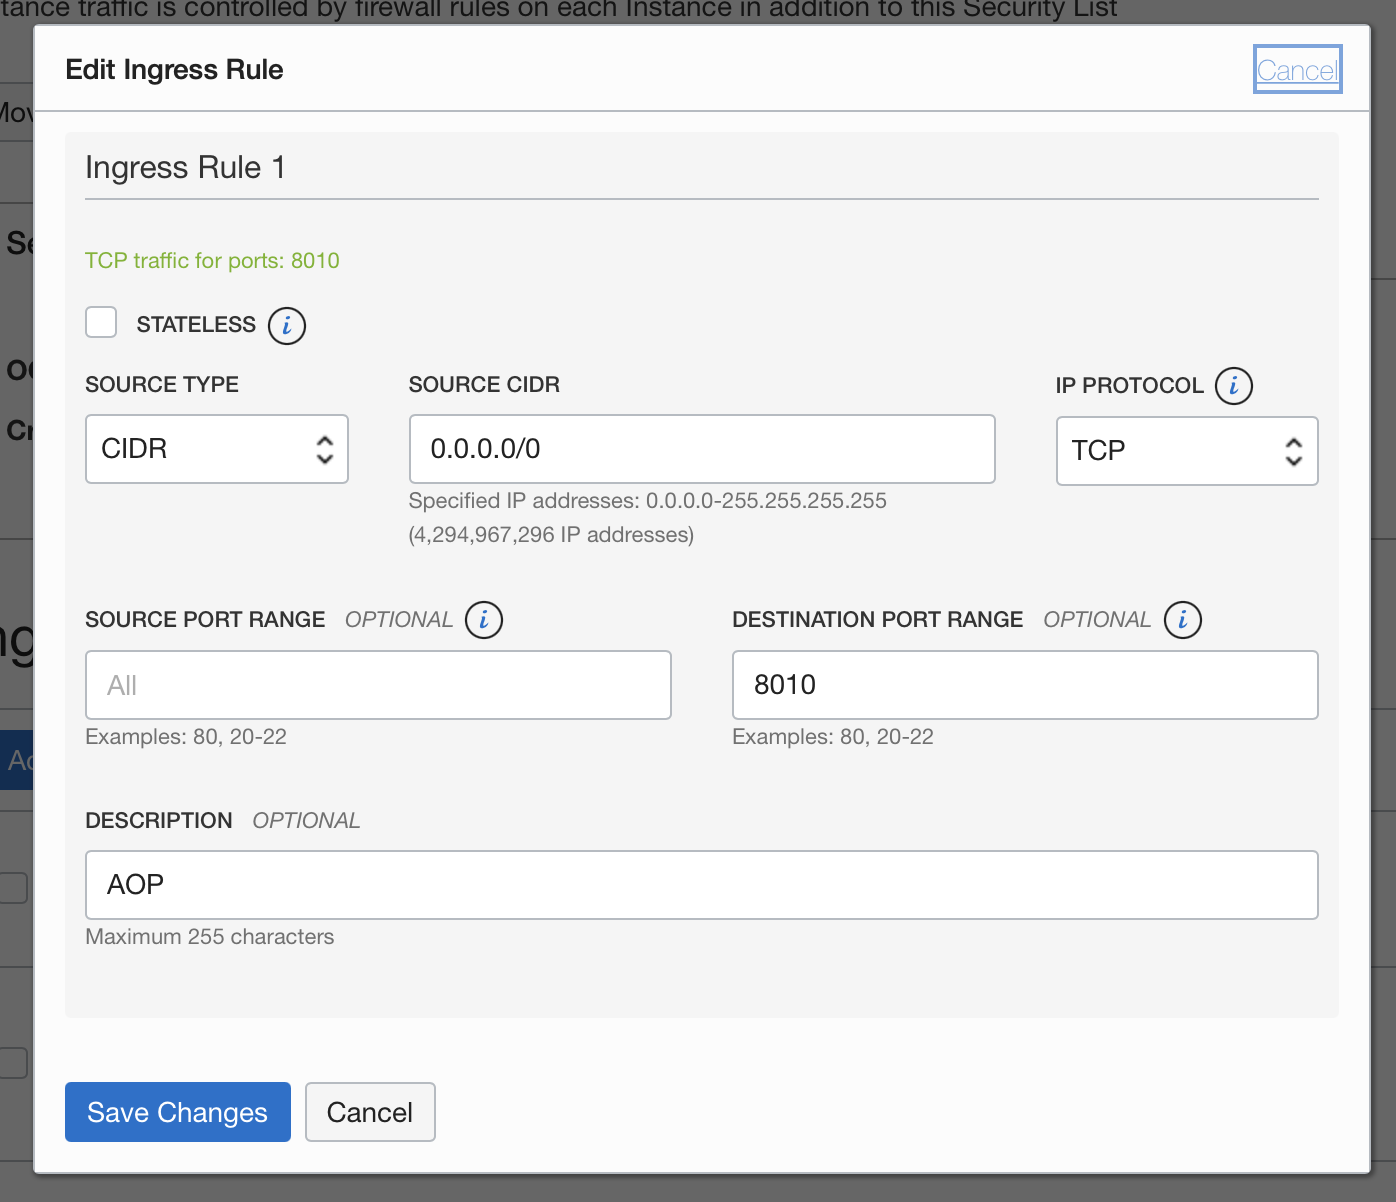
And Add Ingress Rules:
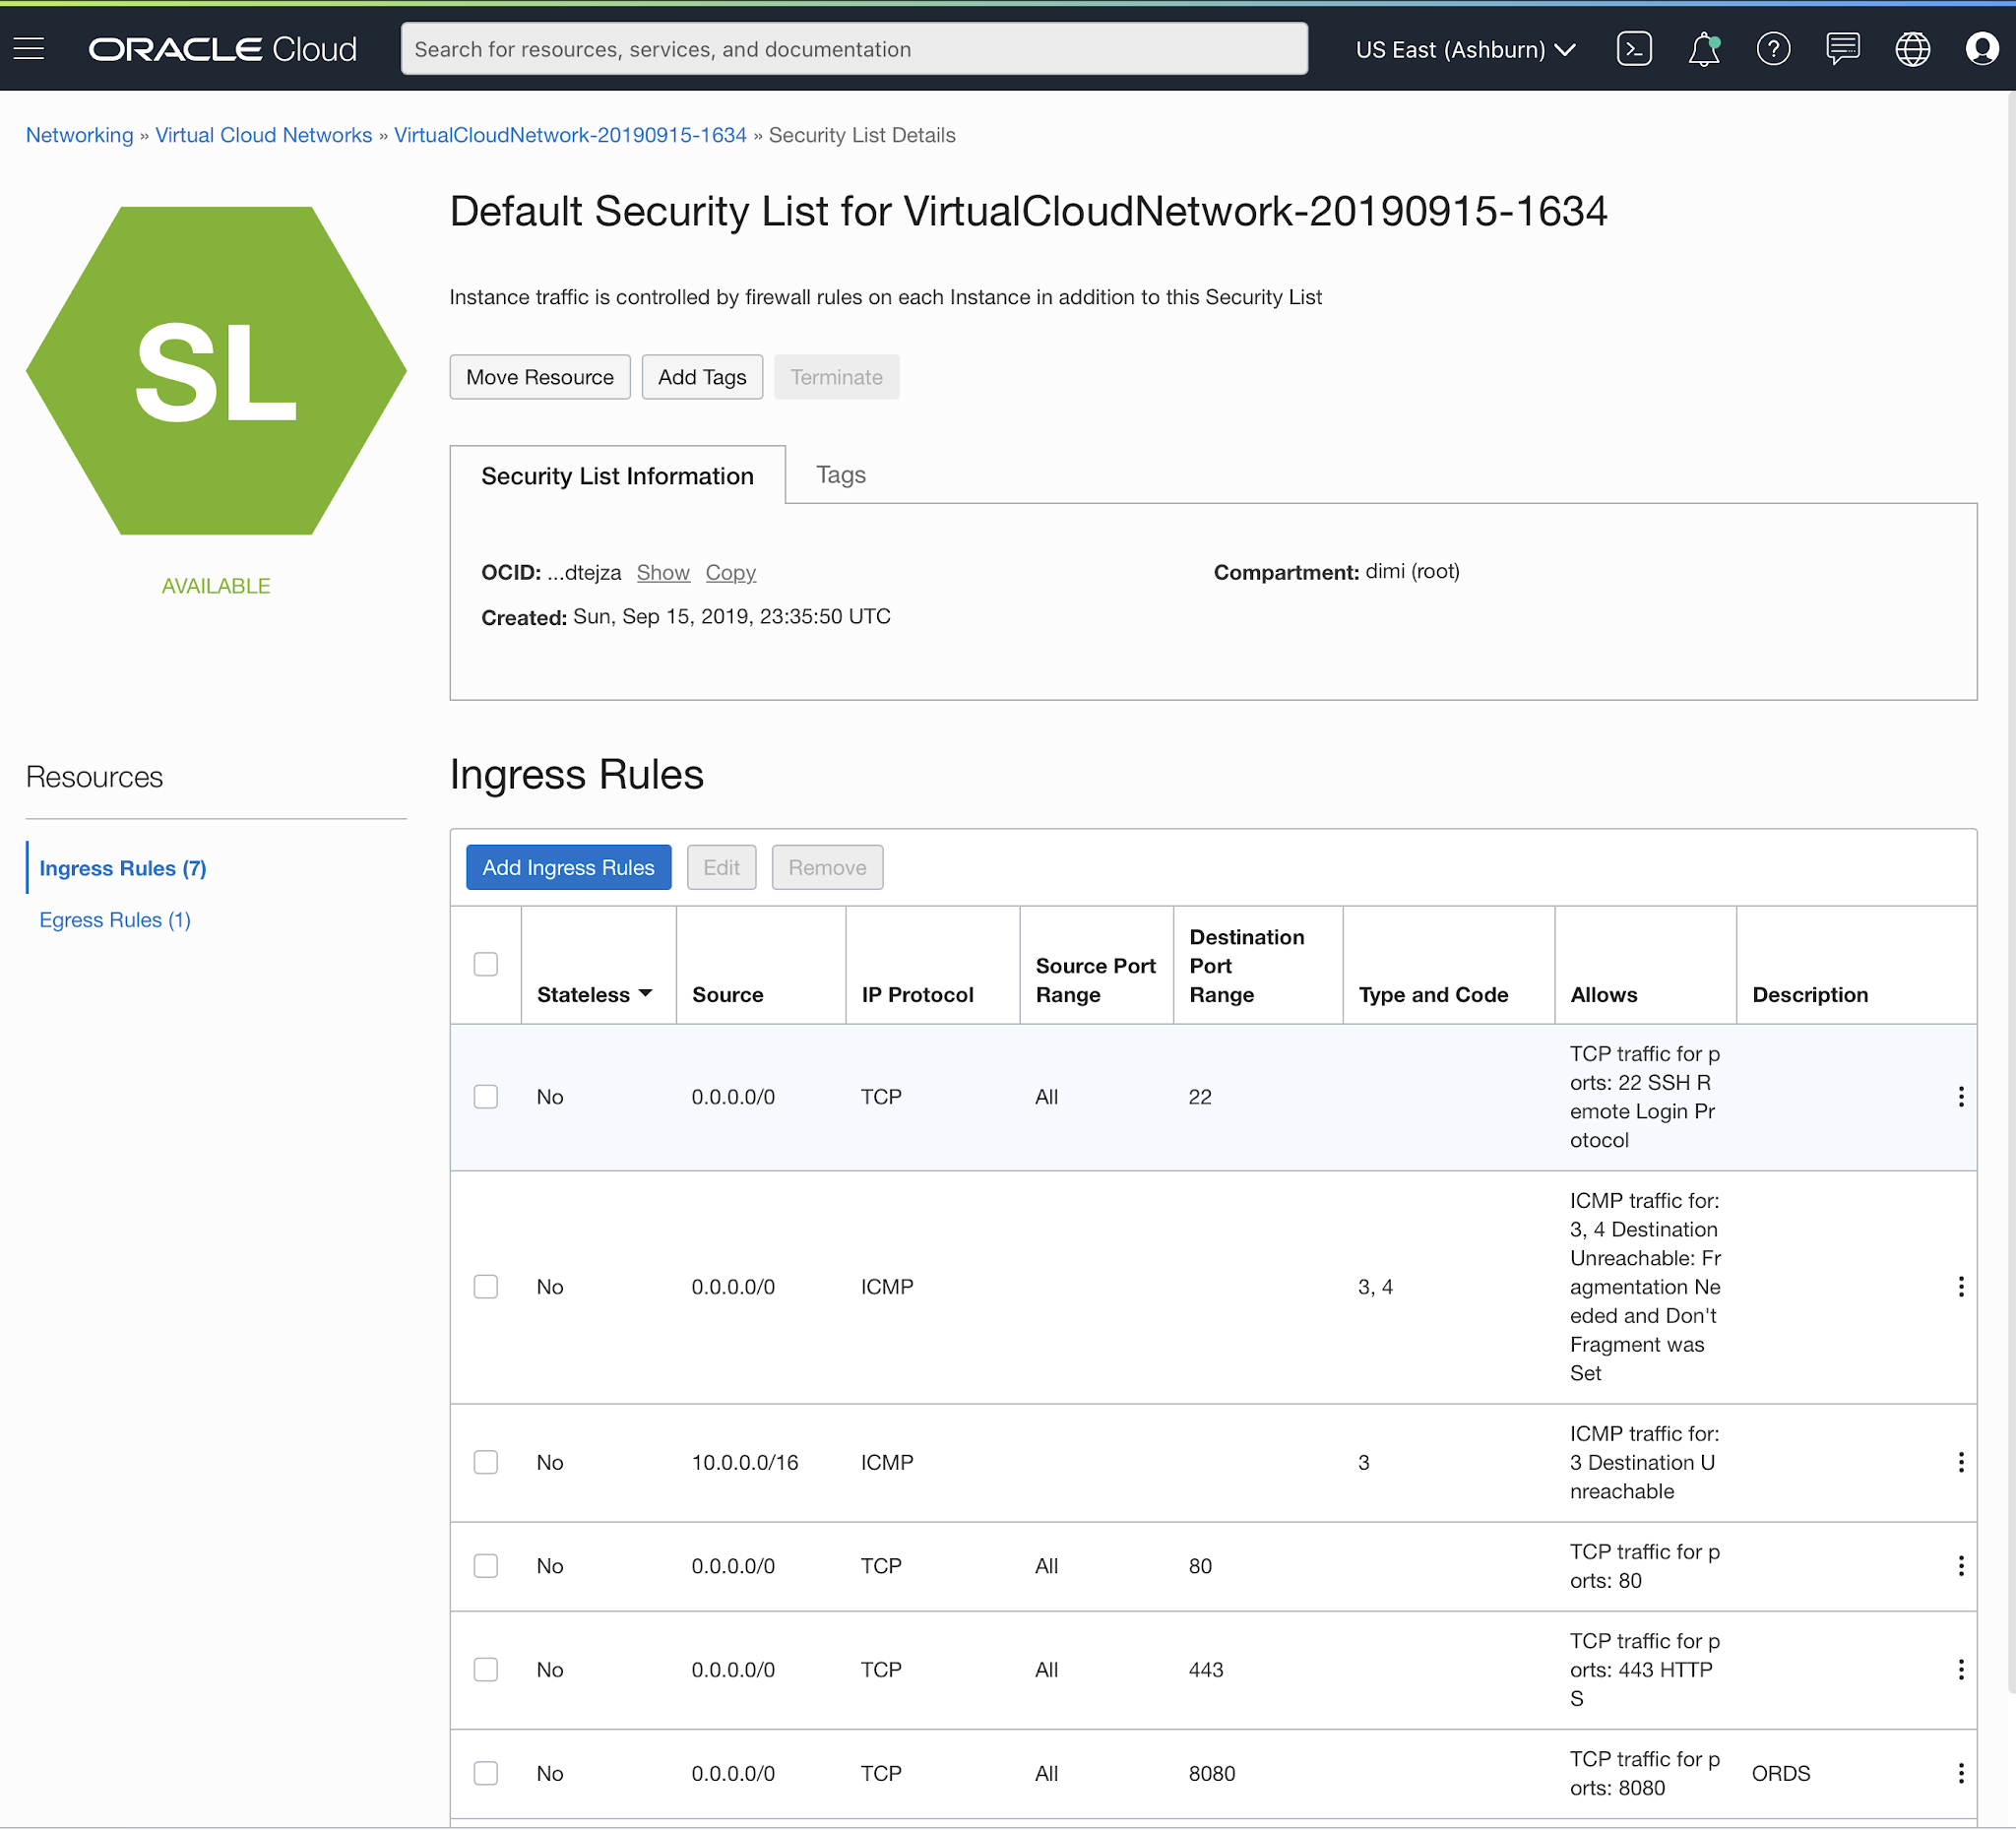
Add the port AOP is running on. By default, AOP is running on port 8010, but you could change that in the instance if you wanted, and hit Save Changes:
The Compute instance is now fully configured.
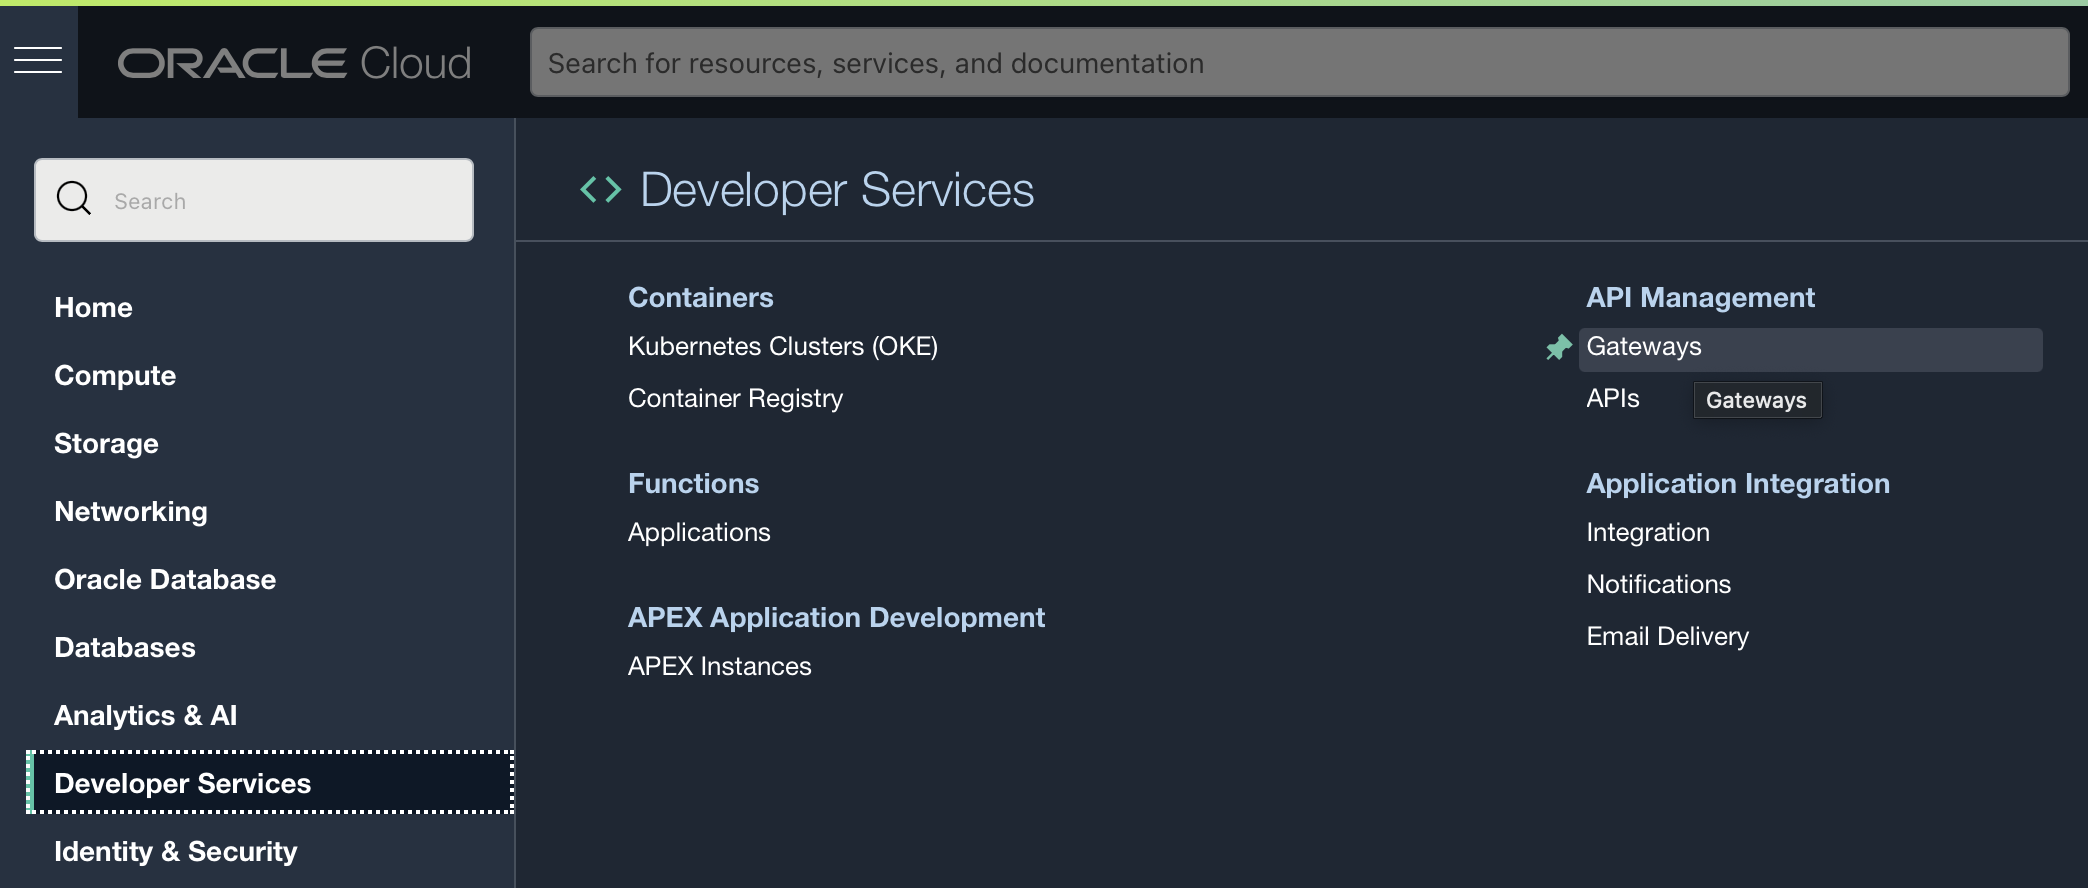
(3) The issue with the APEX Service is that it only allows HTTPS calls. Instead of dealing with SSL certificates, we will make use of the Gateways feature in the Oracle Cloud which you find under Developer Services - API Management - Gateways
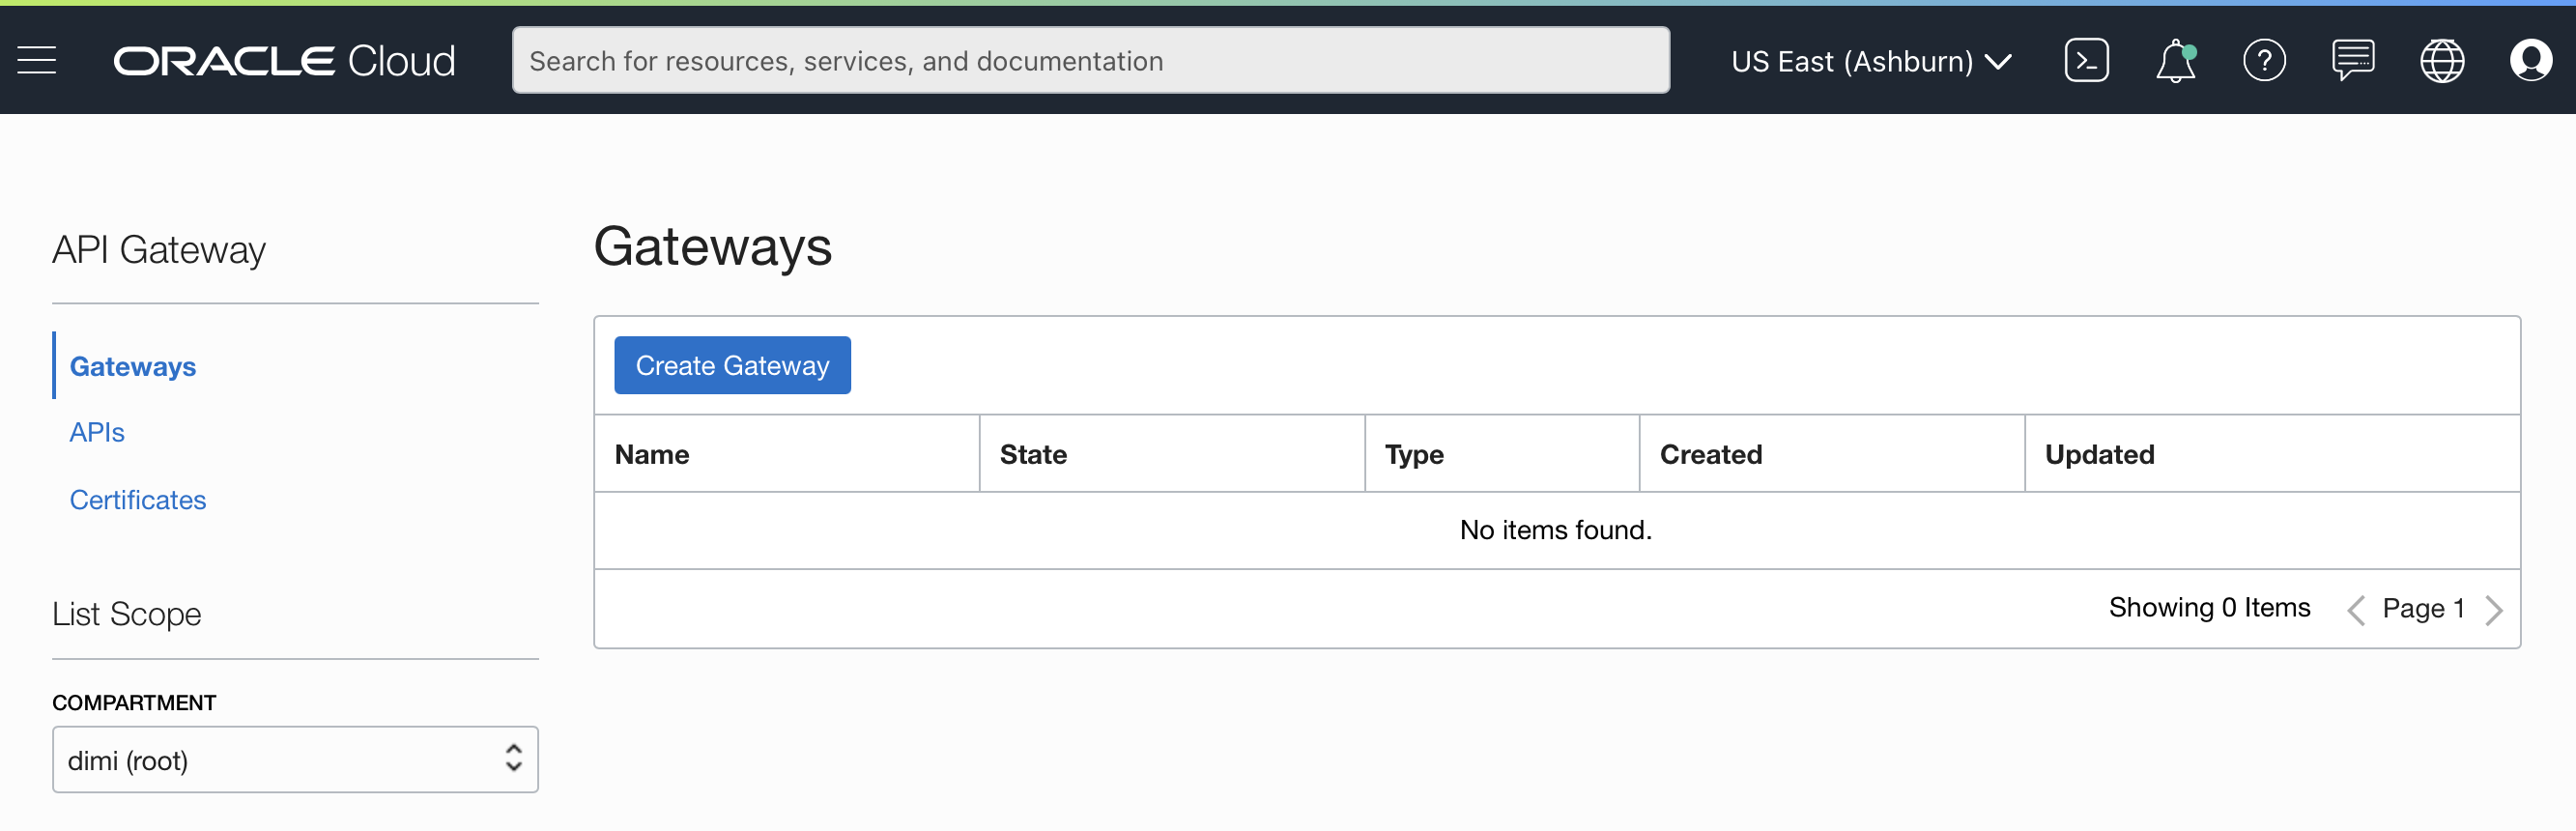
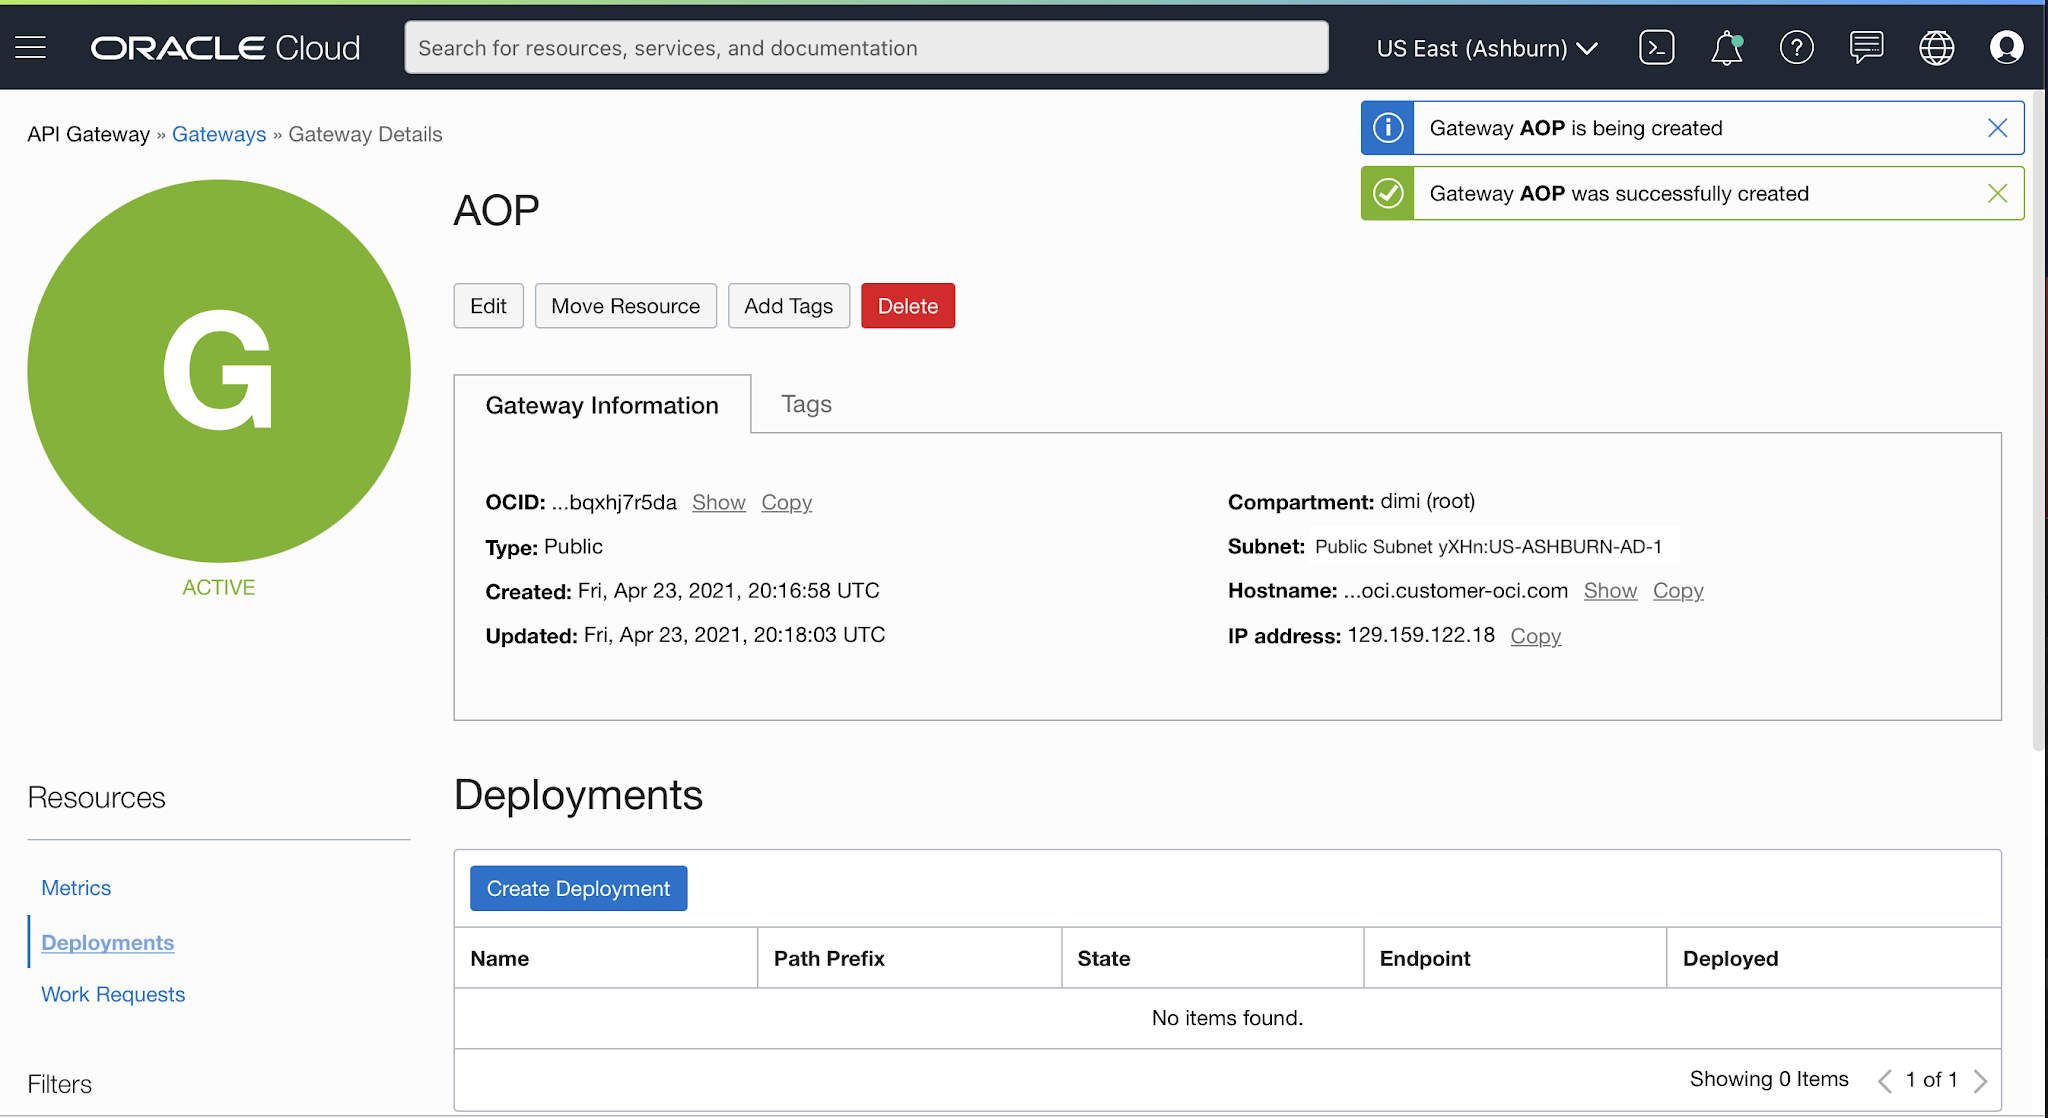
Create Gateway:
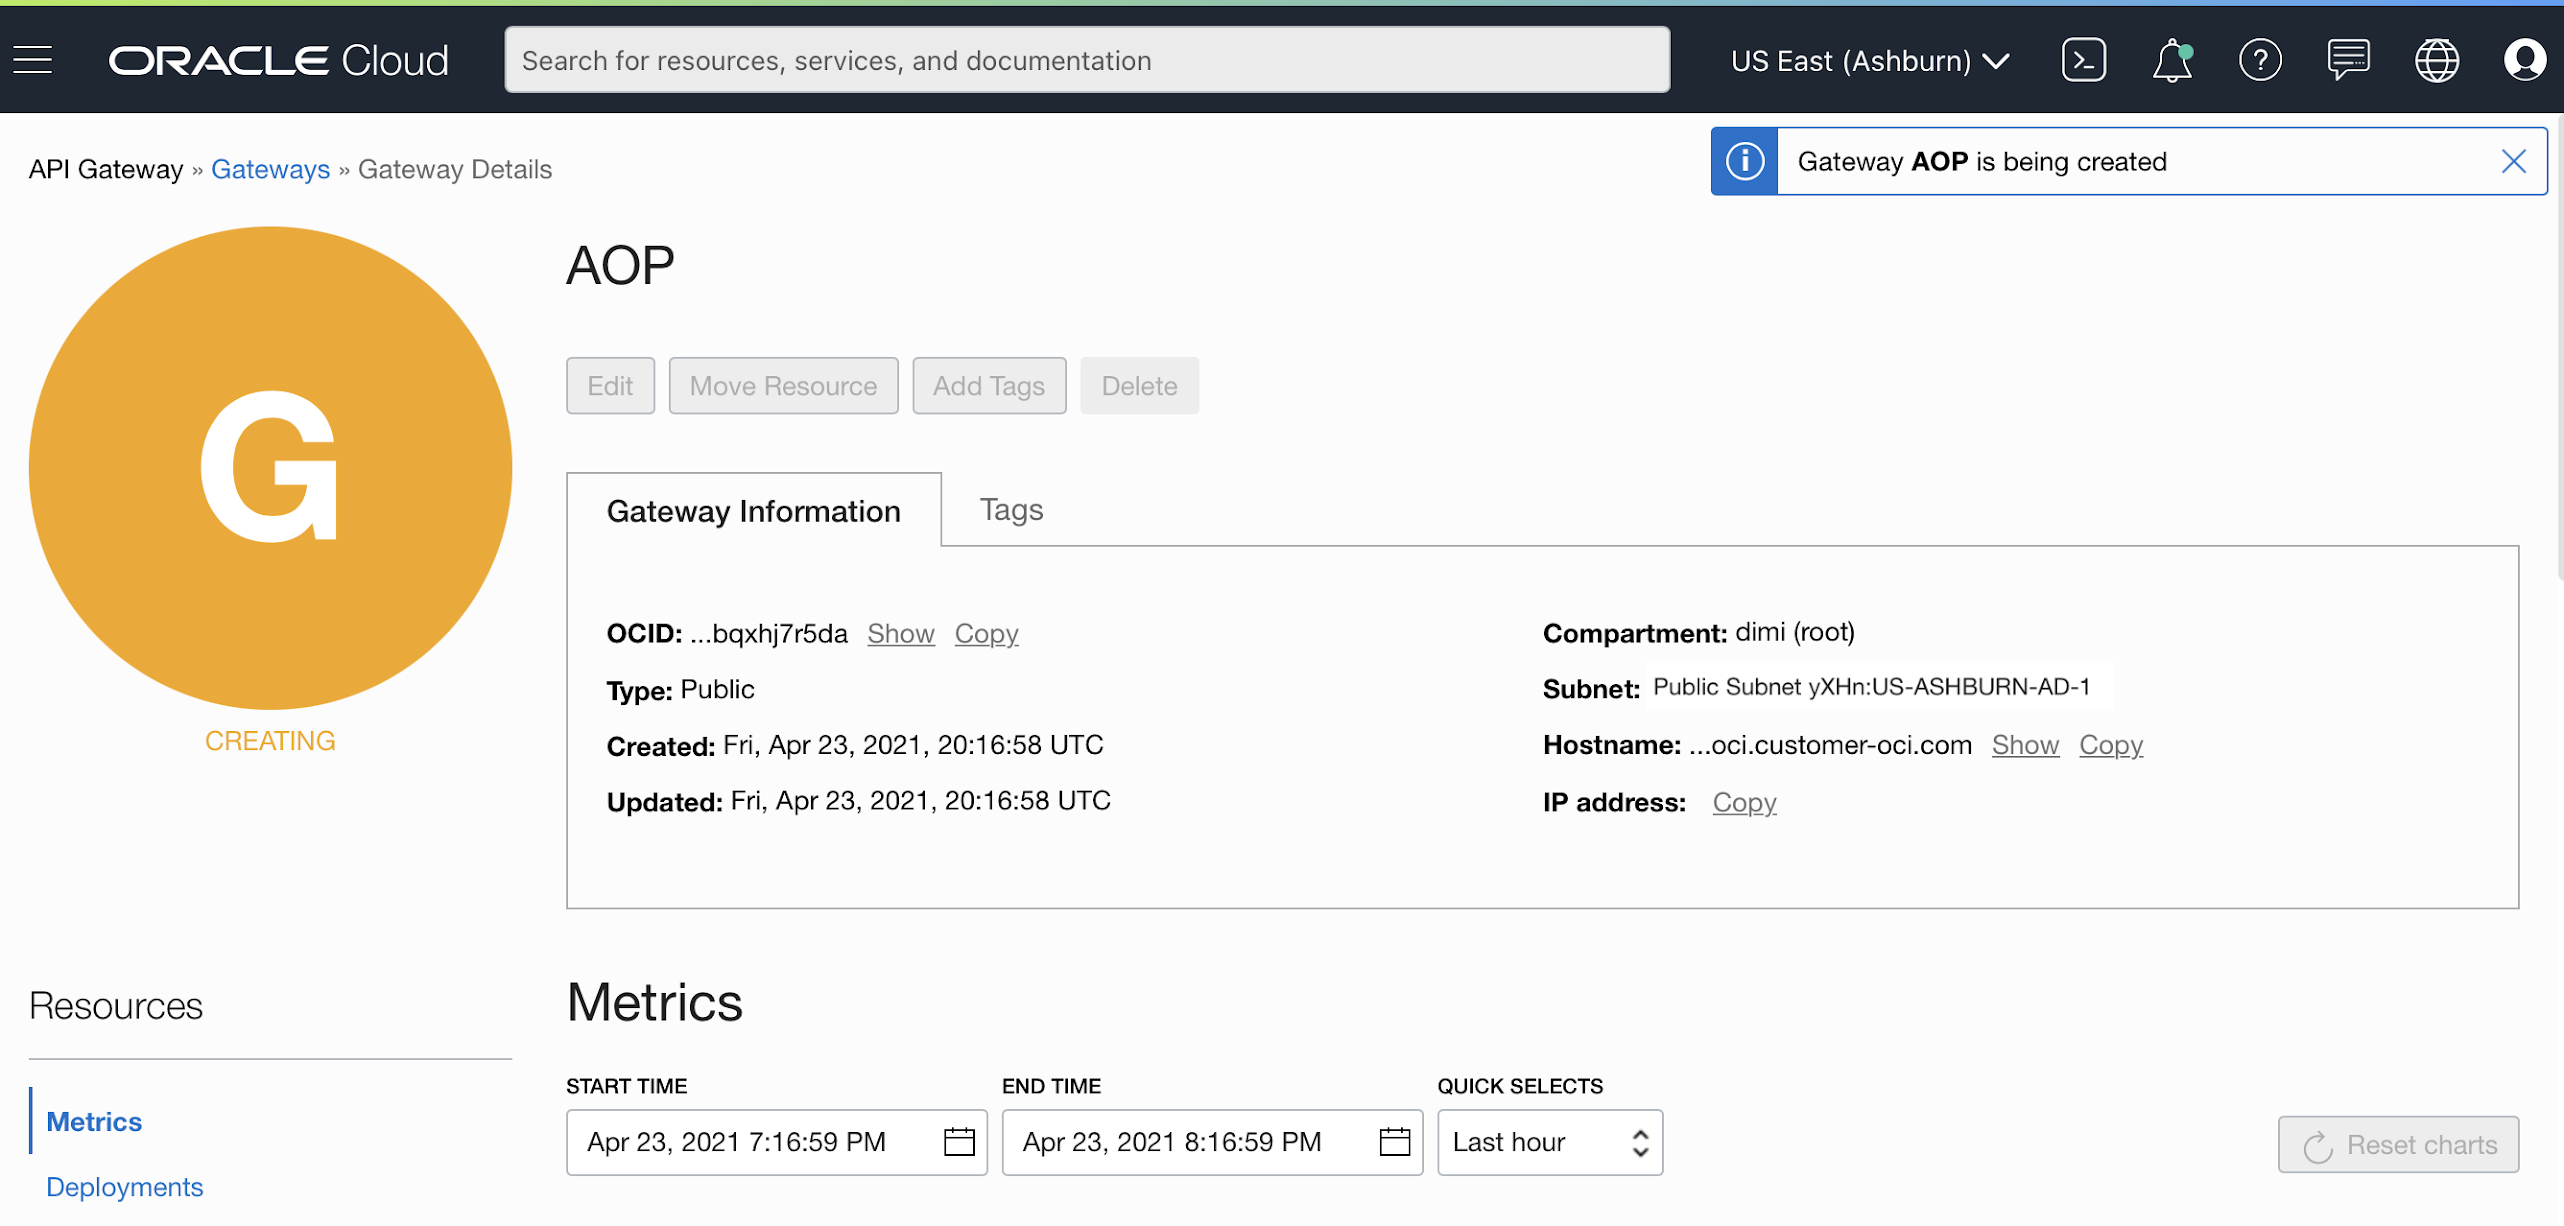
Give it a name and hit Create:
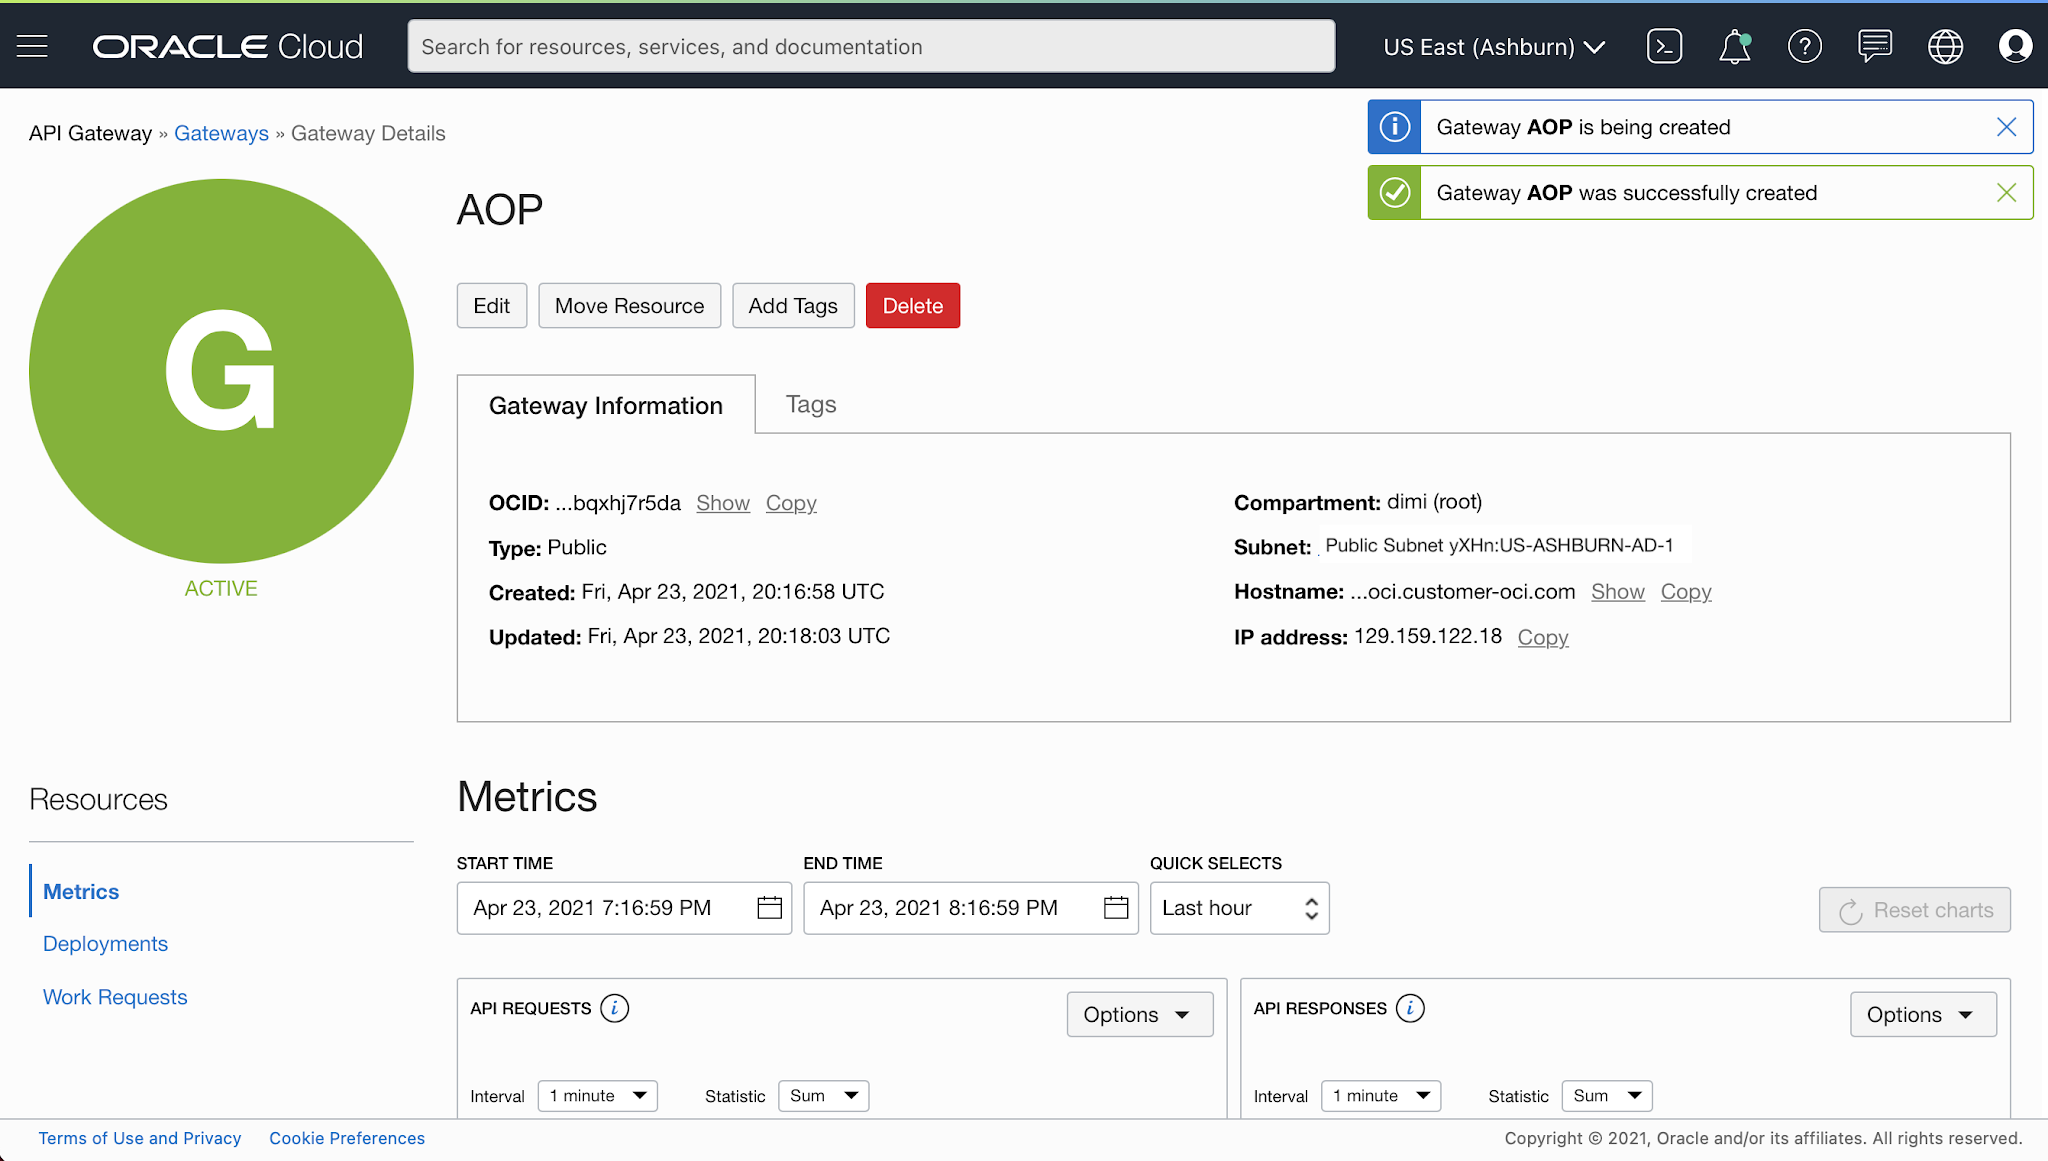
Once the Gateway is created go to the Deployments section:
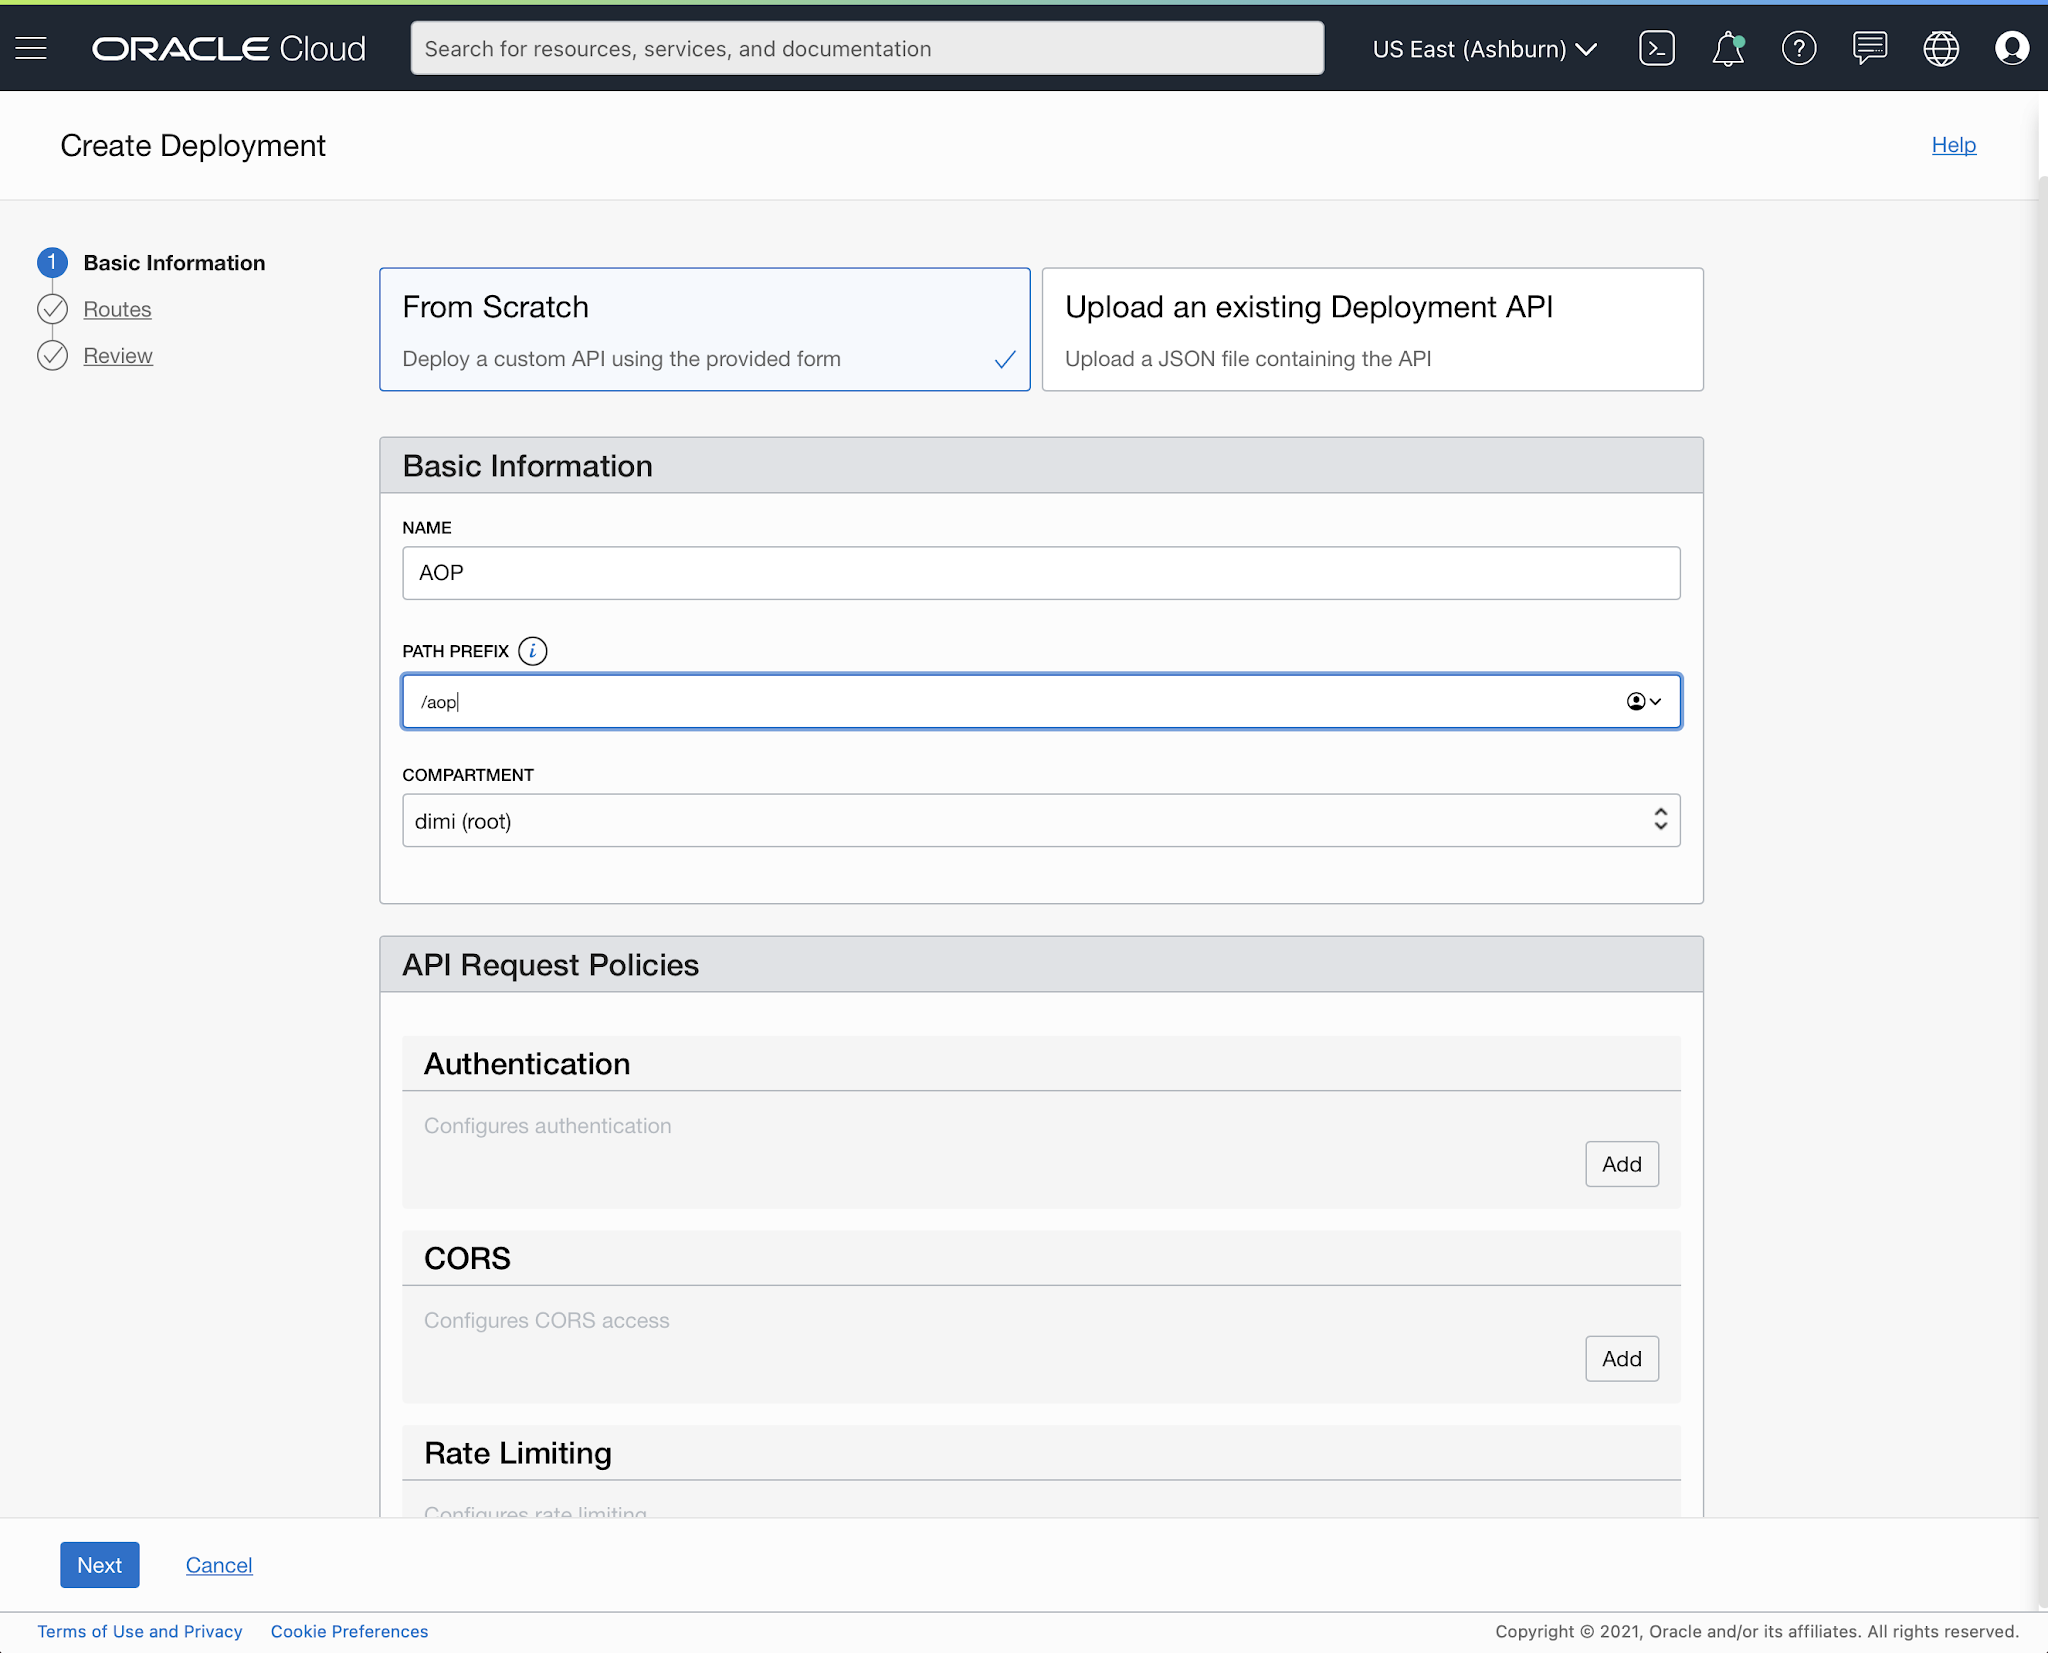
Create Deployment:
Give it the name AOP and path prefix /aop and hit the Next button
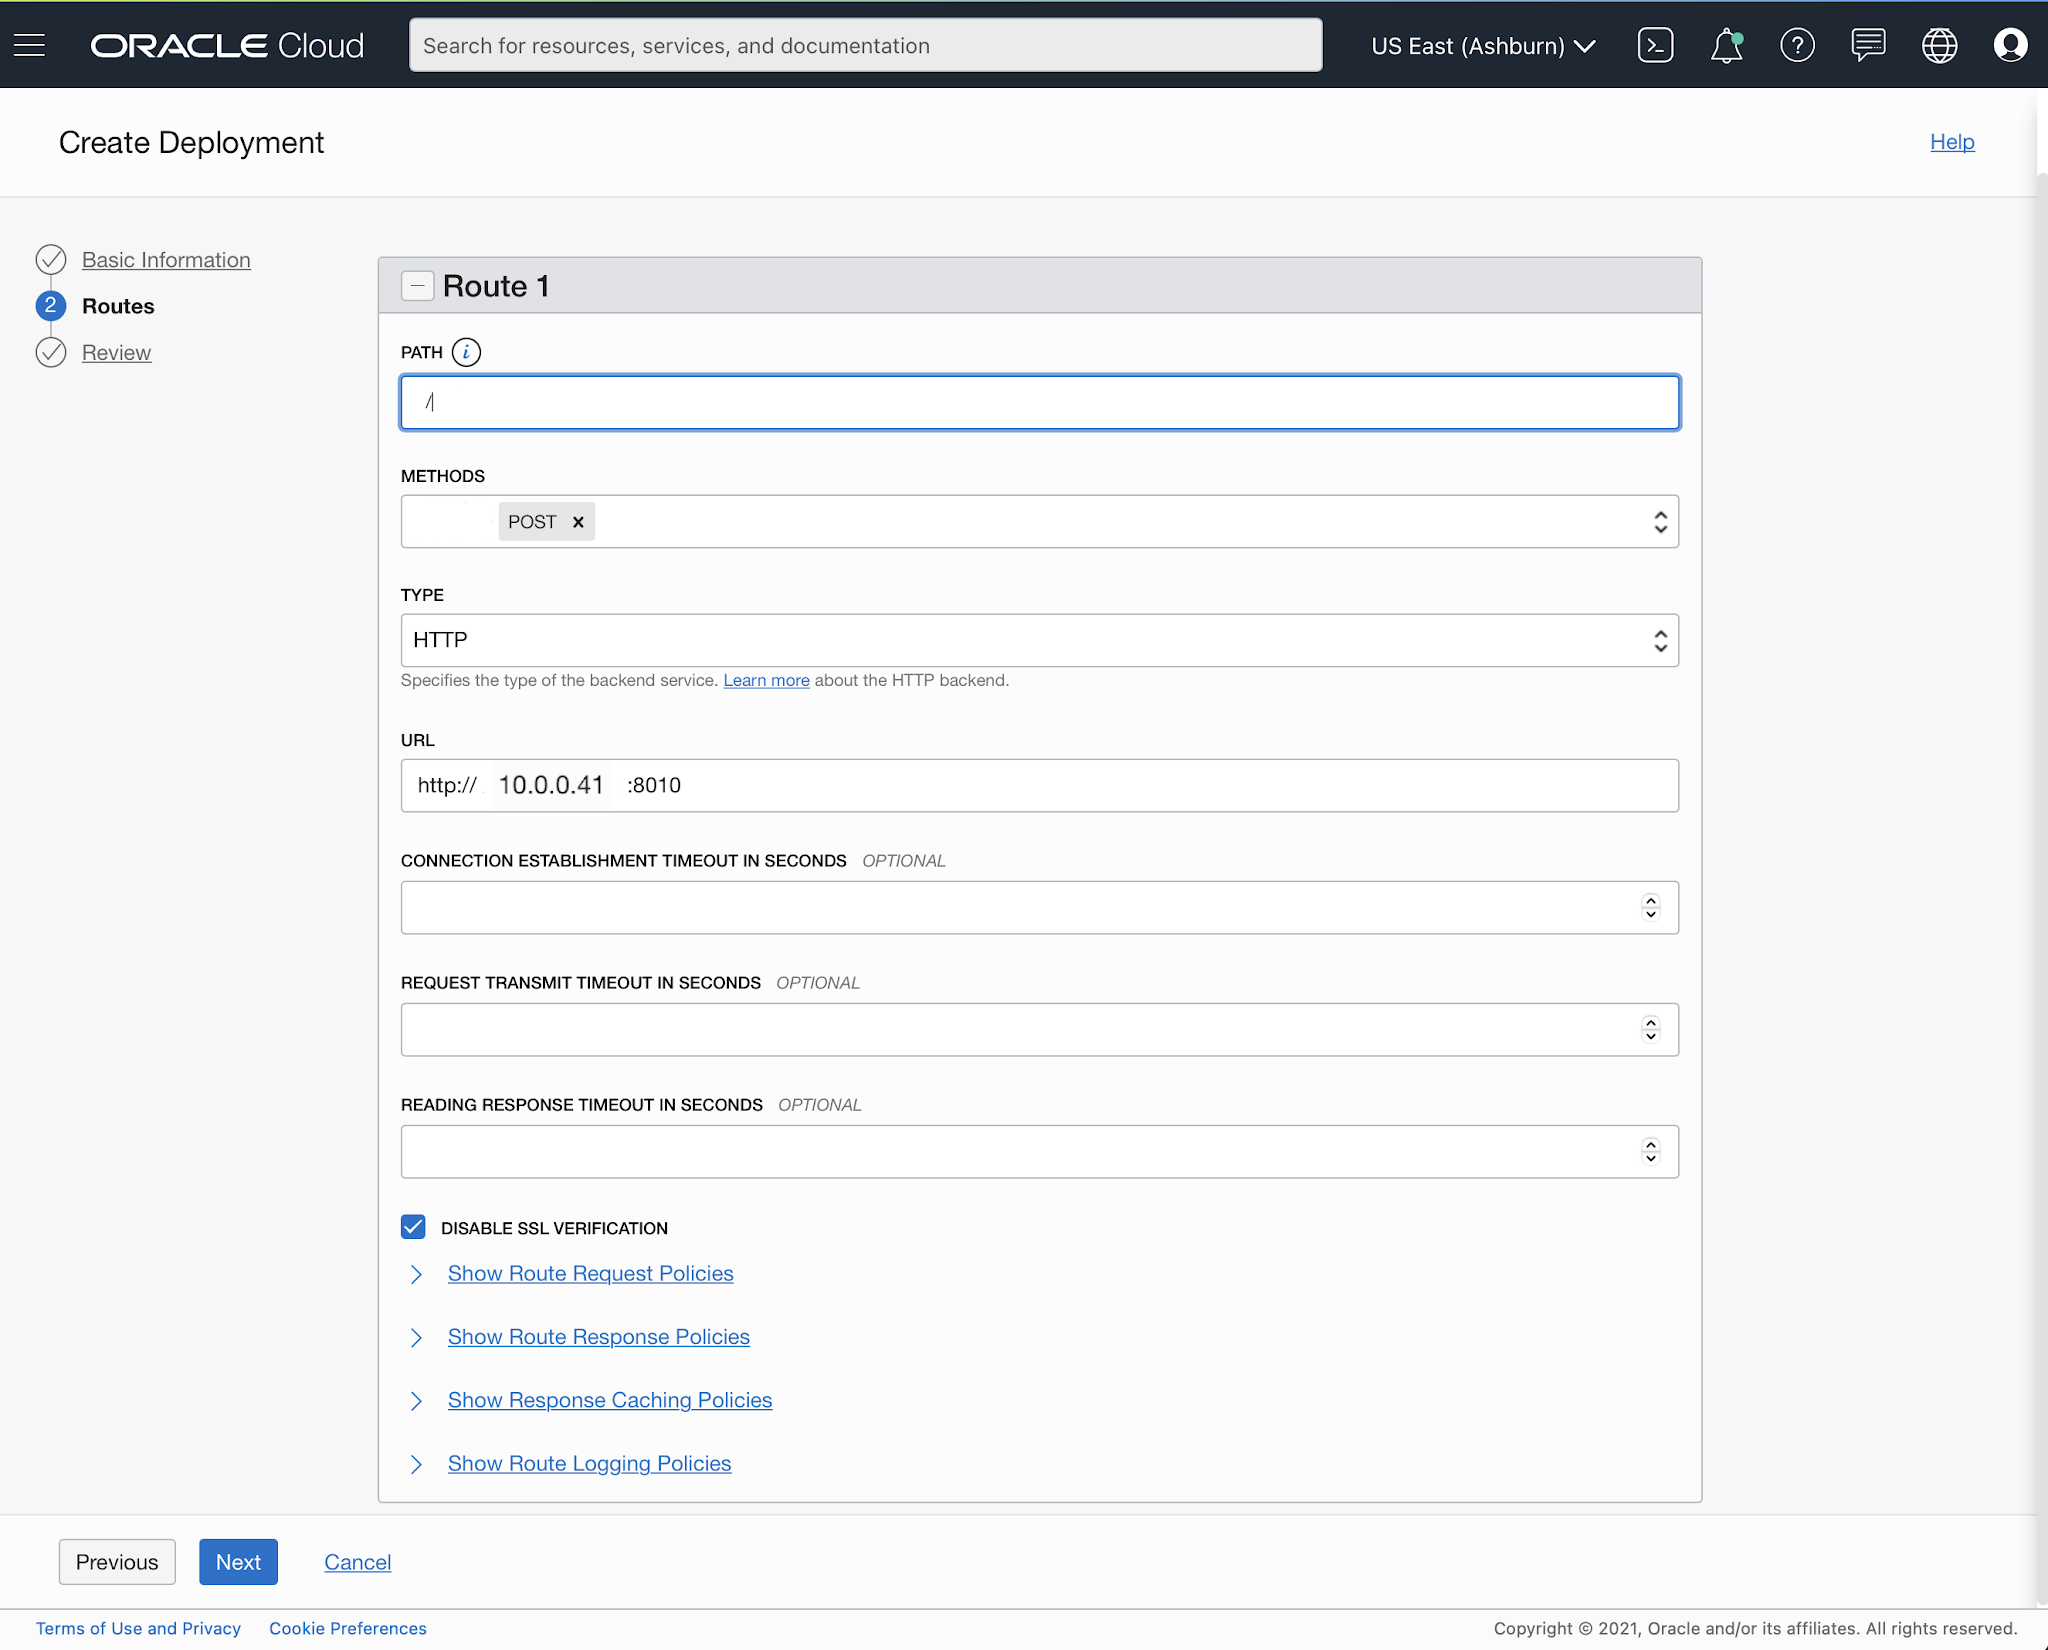
The path can be / and for the URL use the Private URL of the Compute instance.
Make sure to check the "Disable SSL Verification". Our Compute doesn't have SSL, but the Gateway does and the APEX Service will only talk to the Gateway.
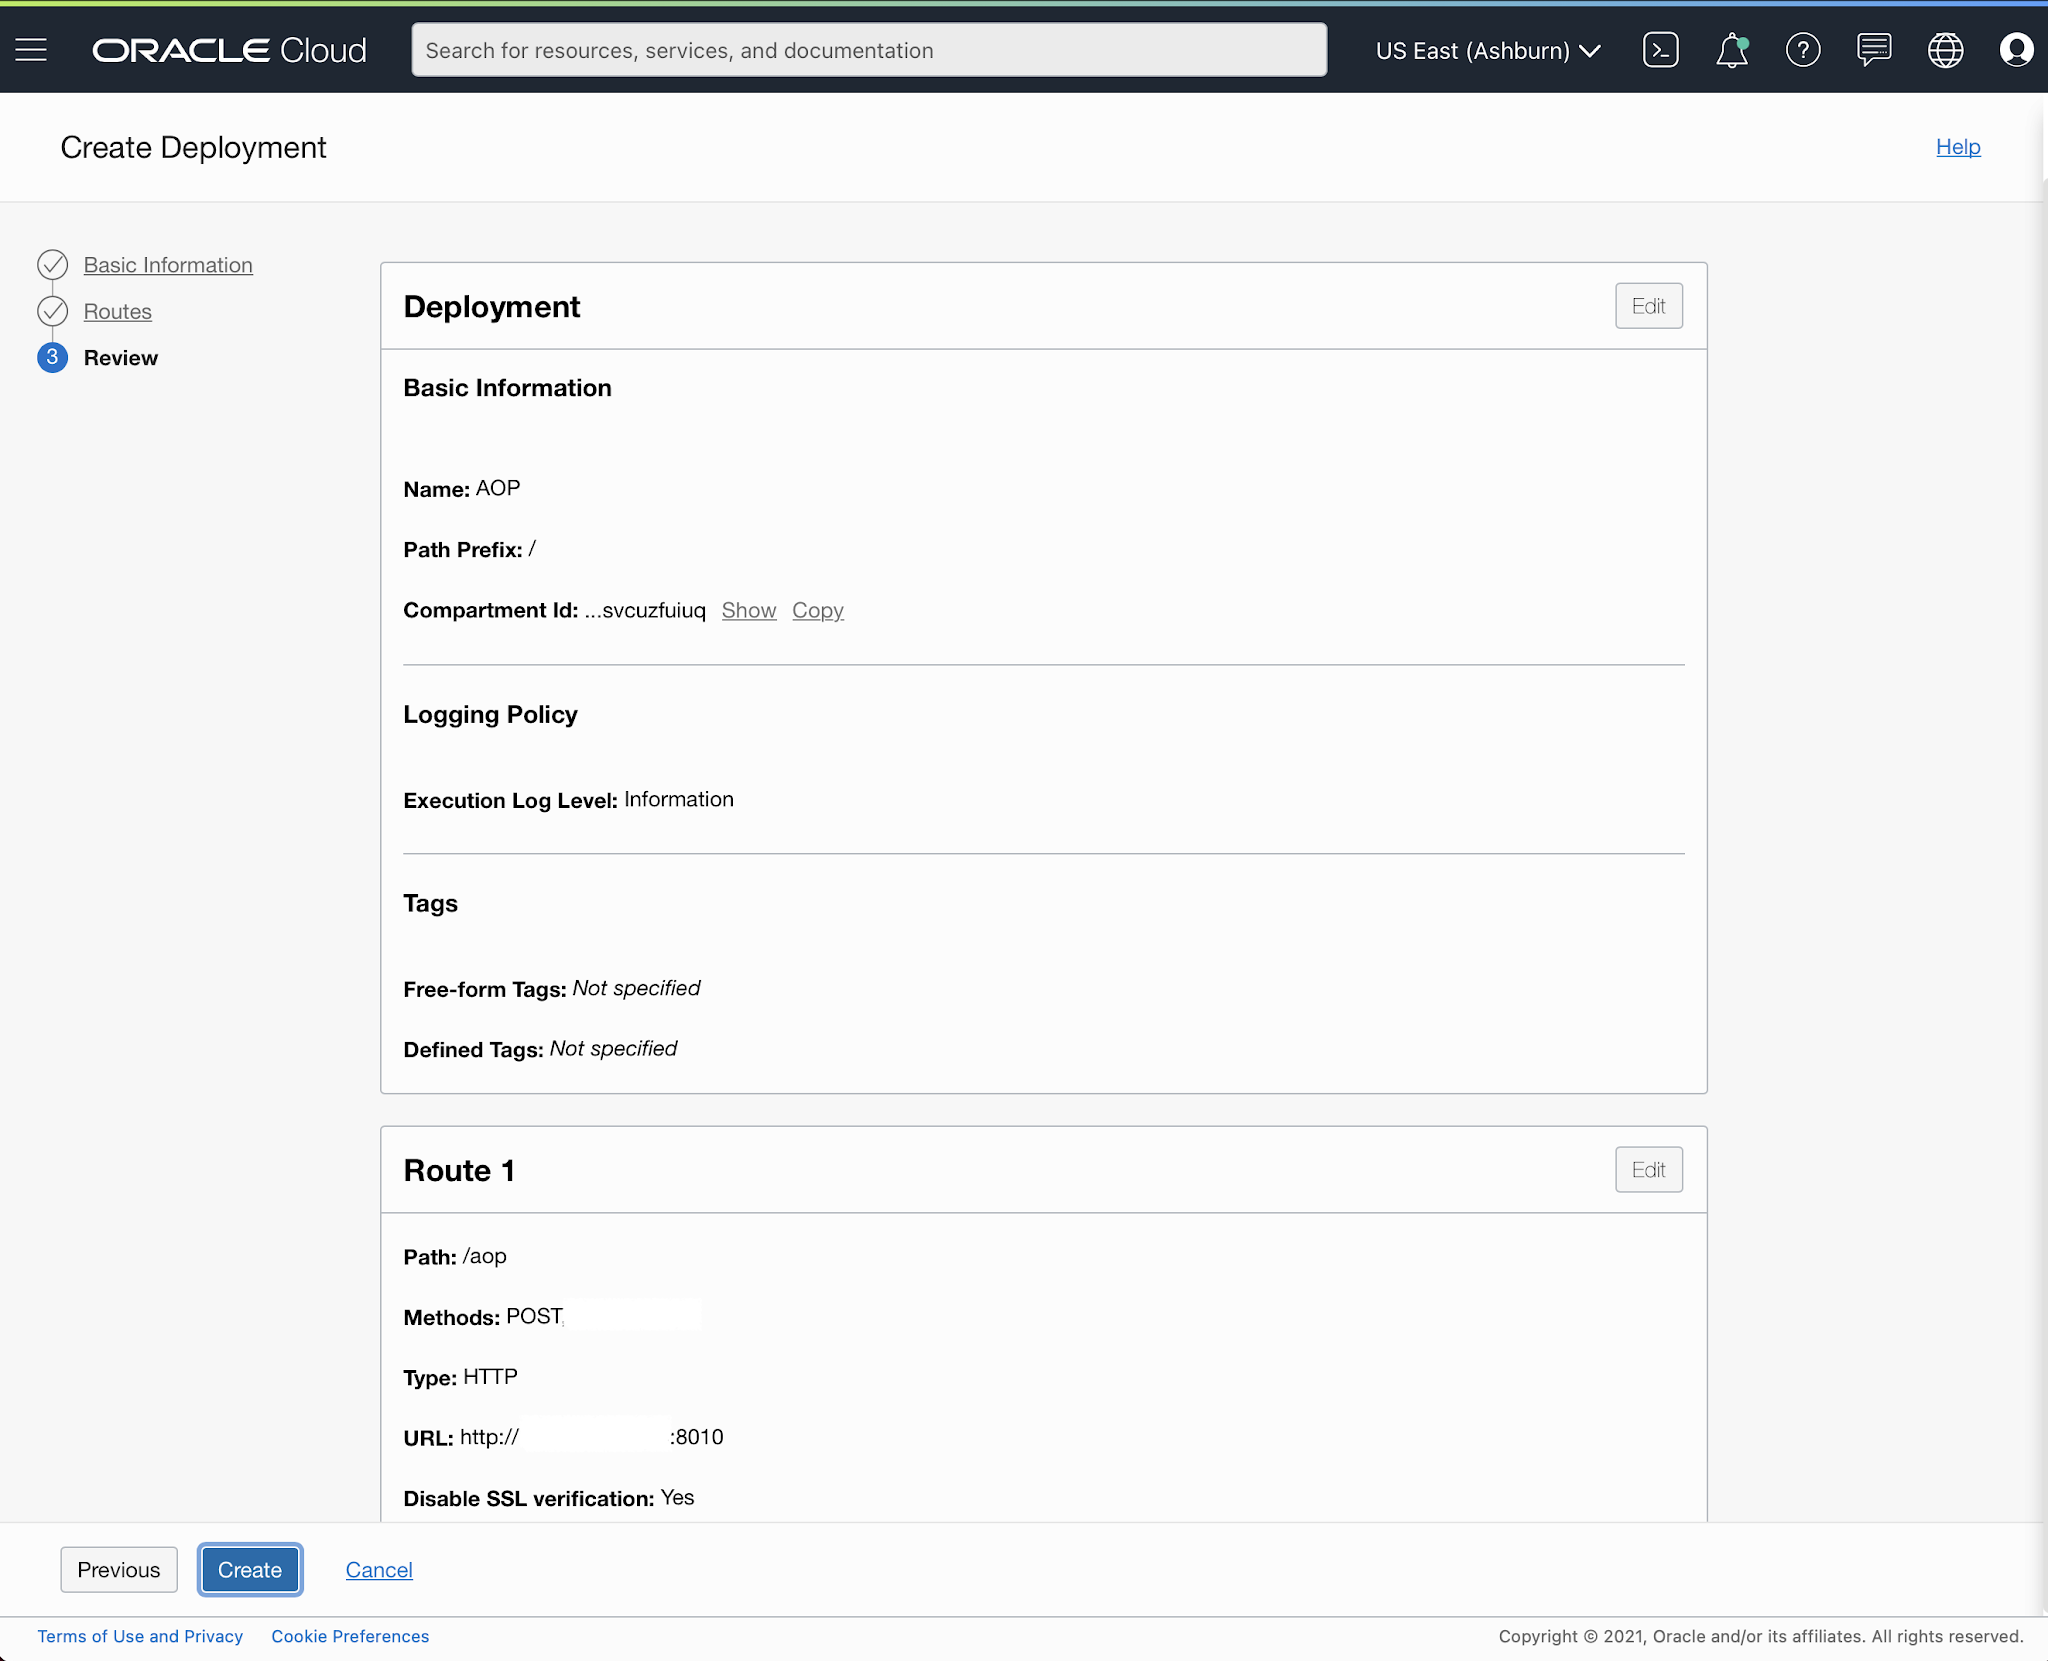
In the overview screen hit the Create button
And you will see that AOP is being deployed and becomes Active:

Click the Copy Endpoint in the Deployments section - this is your AOP Server URL!
Those are basically the steps to get your own AOP Server running with the APEX Service.
In fact, it's not only linked to the APEX Service, you can use this technique for any Oracle Cloud service, like Autonomous Database or your database on another Compute instance.
To manage the AOP Server here are some commands you can use when connected to the AOP Server:
start aop : systemctl start aop
stop aop : systemctl stop aop
status aop : systemctl status aop
autostart at boot : systemctl enable aop
remove autostart at boot: systemctl disable aop
Happy printing!
Author: Dimitri Gielis
View original post here.

Dimitri Gielis
Founder and co-CEO
Passionate about bringing ideas to life with code. Founder and CEO of United Codes and APEX R&D. Loves the Oracle Database and Oracle Application Express (APEX).
Comments
No comments yet, be the first one to let us know what you think of this article!